How to send an eSignature request from Nitro Sign
You can send a signature request from Nitro Sign, Nitro Pro, or Microsoft Word. This article explains how to send a signature request using Nitro Sign.
To learn how to send a request from Nitro Pro, see the related article.
Initiate a Signature Request
There are three ways to initiate a signature request from within Nitro Sign:
- From the eSign dashboard
- Click the "Send for Signature" button located in the top right corner
- Select a document from your local machine, from one of the supported cloud storage providers, or choose a document you've previously uploaded to Nitro Sign
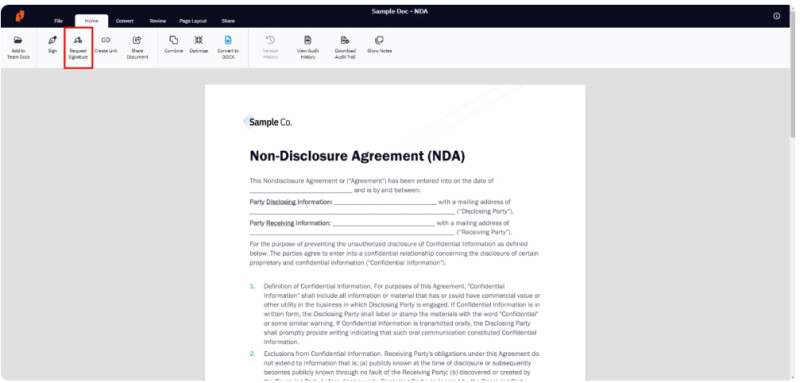
- With your document open
- Open the document you need signed from My Documents. Select "Home" or "Share" from the top ribbon and click "Request Signature"
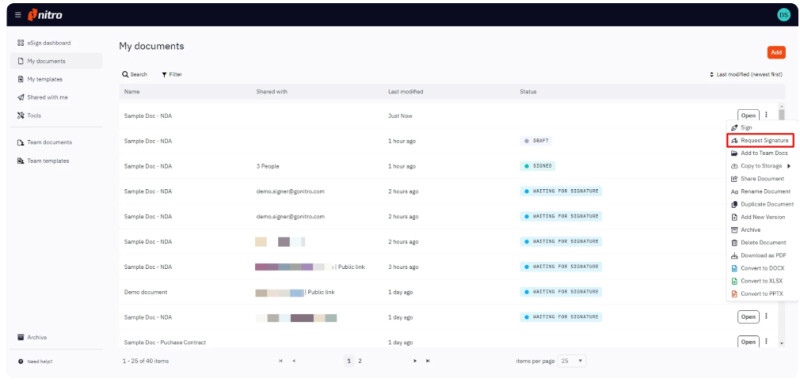
3. From My Documents
- From your My Documents library, hover your mouse over the document you would like to send for signature
- Click the Quick Actions menu button and select Request Signature from the dropdown
To use the Manual Add a Recipient feature
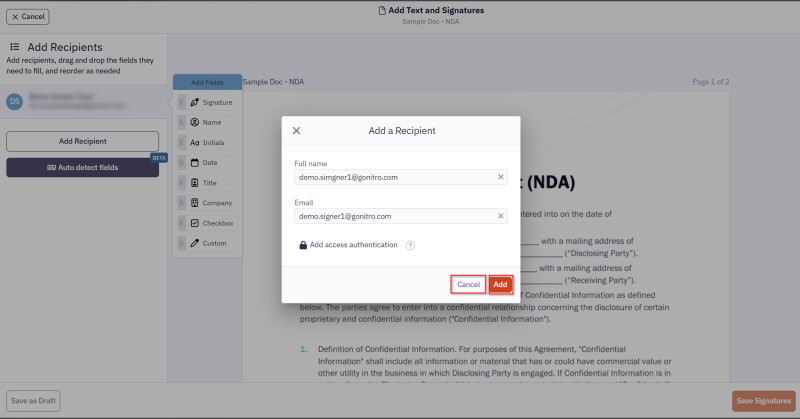
- Once the signature request has been initiated, on the Add Recipients screen, click the Add Recipient button
- In the pop-up window, fill in the recipient’s information: Name (optional) and Email (required)
- Click Add to continue, or click Cancel to discard the action
- At this stage, you also have the option to add Multi-Factor Authentication (MFA) to this signature request. Learn more about MFA here.
- If you would like to add more than one signer to the signature request, click Add Recipient in the Signers panel and enter the other signers' details.
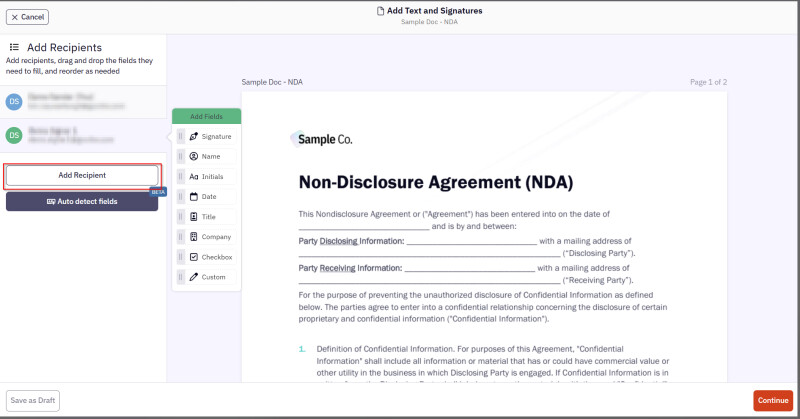
- You can also edit or remove a recipient by clicking the Quick Actions menu button next to the recipient in the Signers panel and selecting the appropriate action from the dropdown
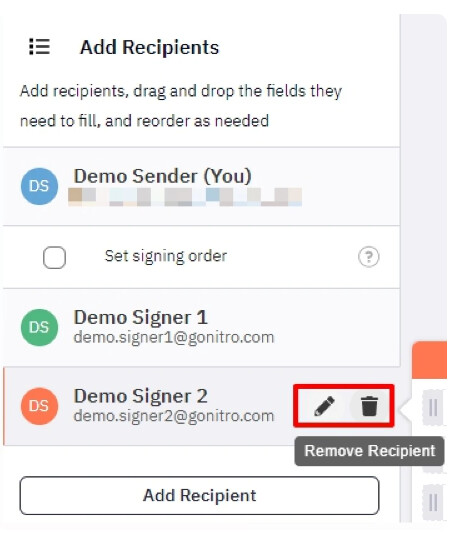
Note: The Signers panel is collapsible to allow more space for the document. To collapse the section, click the Quick Actions menu icon on the top right of the Signers panel.
Note: The Signers panel is collapsible to allow more space for the document. To collapse the section, click the Quick Actions menu icon on the top right of the Signers panel.
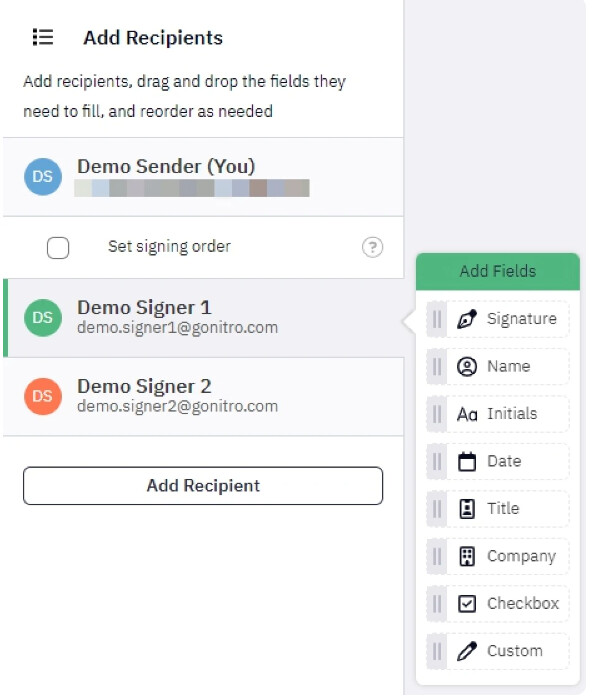
- To add signature fields to the document:
- Click on a recipient in the Signers panel
- Drag and drop the required field(s) to the appropriate position(s) on the document
Note: Each field can be moved, resized, or changed to a different field type
- After the fields for each recipient have been placed on the document, click Continue in the bottom right corner
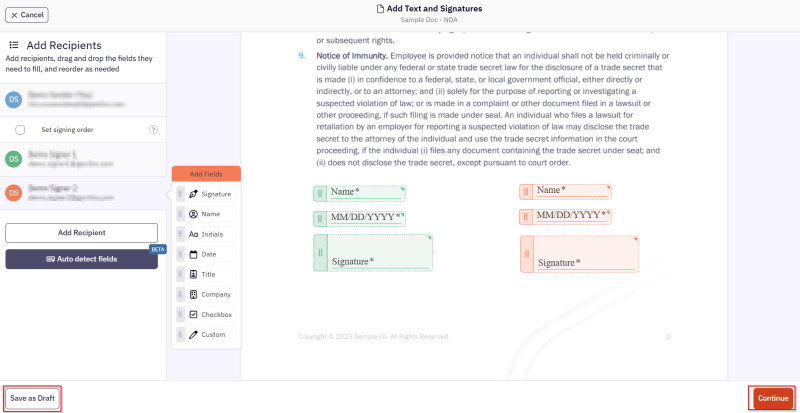
Note: You can also save the document as a draft to be sent later.
To use the Auto Detect Fields feature
Notes:
- This option scans the document and automatically detects recipients and fields for signing or filling.
- This feature is not available in all Sign plans. To find out more please check our Plans & Pricing page or contact your sales rep.
- Like other AI-powered and Text Extract features in Nitro, this feature in Nitro Sign requires that both 'Enable Advanced Tools' and 'Enable Generative AI Tools' are turned on in your Nitro Admin settings.
- On the Add Recipients screen, click the Auto Detect Fields button.
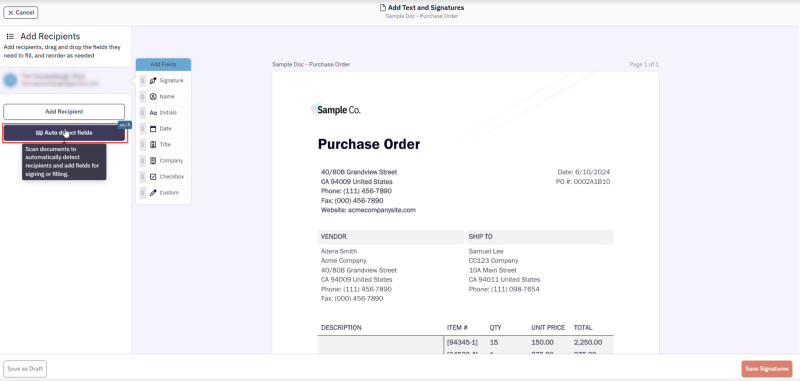
- The system scans the document.

3. A banner appears at the top of the page displaying the scan status, the number of recipients identified, and the number of fields detected.
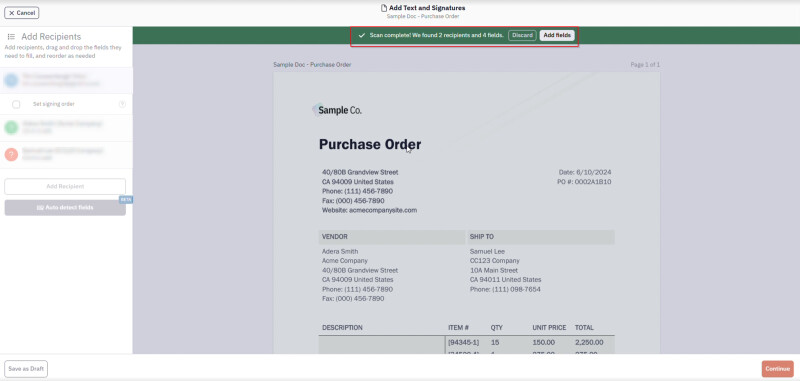
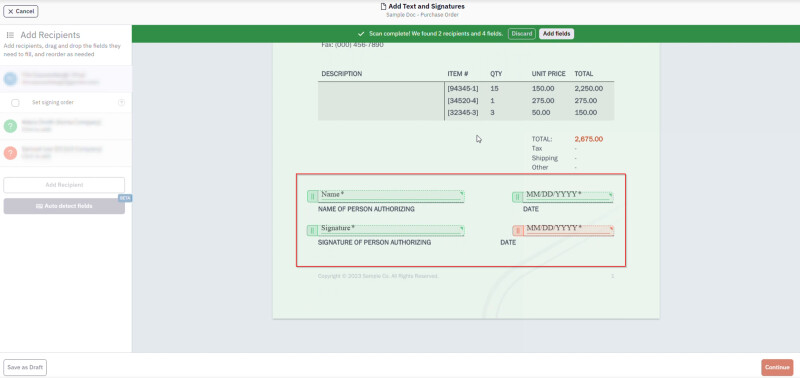
- You can click Discard to remove the detected fields or click Add Fields to keep them.
Note: You can see the auto-detected fields in the document.
- To assign a field to a recipient, select Click to Add below the recipient’s role.
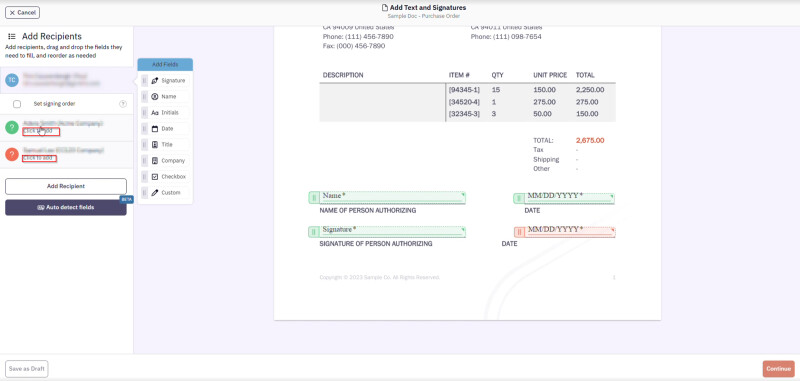
- In the pop-up window, fill in the recipient’s information: Name (optional) and Email (required).
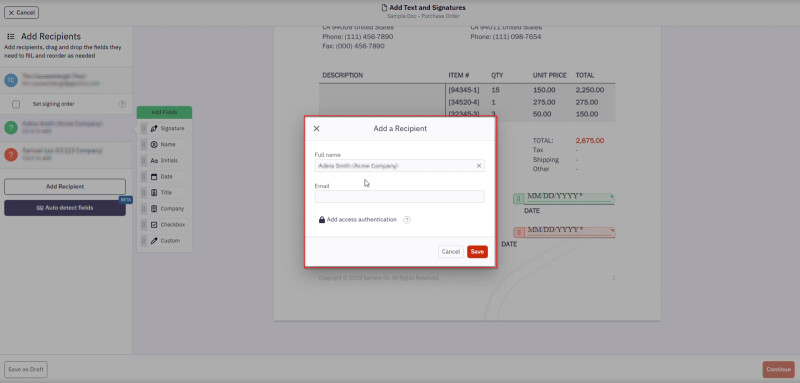
- Click Save to continue, or click Cancel to discard the action
- Click Continue to proceed
Note: You can also save the document as a draft to be sent later.
Send an eSignature Request
- Review the list of recipients and the prepared document
- Optional: Customize the email subject and message that will be sent with the signature request
- Optional: Add CC recipients. They will have view-only access to the document and will receive a notification when all recipients have signed
- You can create a new message layout. A message layout includes the email subject and message text used in the signature request.
You can:
- Set the new layout as your default, or
- Save it to your list of layouts for future use
- To create a message layout:
- Click Layouts
- Click New Message Layout
- Edit the subject and message as needed
- Click Save
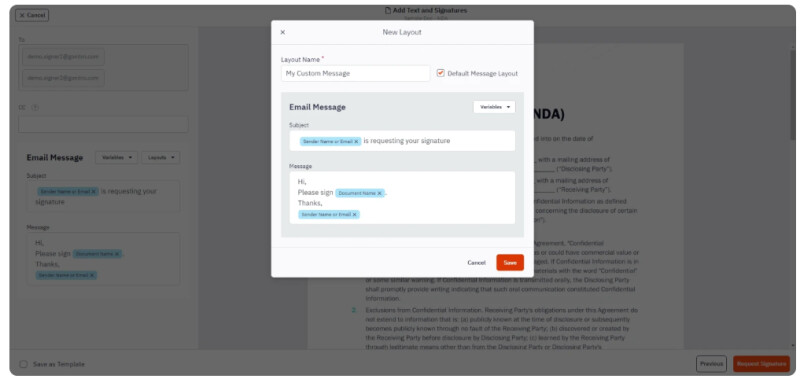
Note: Variable fields can be used, in the instance where your name is saved in your profile this will be used, otherwise your email address will be used.
- Click Request Signature to finish the preparation and send the document out for signature.