Use Nitro Sign with Microsoft Power Automate
The Nitro Sign integration with Microsoft Power Automate supports the following two workflows:
1. Completion of a Nitro Sign signature request triggers some action in another application. You can use this flow to automatically save signed documents to your cloud storage system, or alert teams via emails when signature requests are complete.
2. Some action in another application triggers a saved Nitro Sign template to be sent for signature. You can use this flow to automatically send standard onboarding documents to new employees, or NDAs to new customers.
Search for Nitro Sign within Microsoft Power Automate to get started.
How to set up a Power Automate flow that is triggered when a Nitro Sign signature request is complete
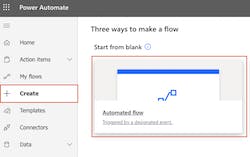
1. When signed into your Power Automate account, select Create from the left toolbar, and then Automated flow
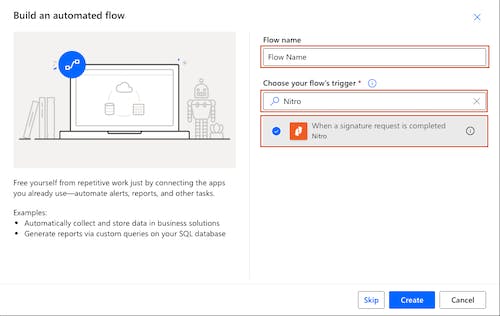
2. In the flow builder, name your flow and then search for Nitro in the flow trigger field. Select the 'When a signature request is completed' Nitro trigger. Click Create.

3. If it is your first time creating a Power Automate flow that includes Nitro Sign, you will be prompted to log in to your account

4. Click + New step and then search for the app (e.g. SharePoint, GMail, Slack, Teams) where you would like to trigger an event and fill out all the fields required by this app. You will be able to automatically pass on a PDF version of the signed document and/or the signed document URL as part of your flow
5. Once you have built and saved your flow, it will be triggered each time a signature request sent from your Nitro Sign account has been completed
How to set up a Power Automate flow that triggers a Nitro Sign template to be sent for signature
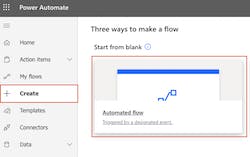
1. When signed into your Power Automate account, select Create from the left toolbar, and then Automated flow 
2. In the flow builder, name your flow and then search for your desired trigger app (e.g. Salesforce, Workday, SurveyMonkey) and event. Fill out any fields required by this app
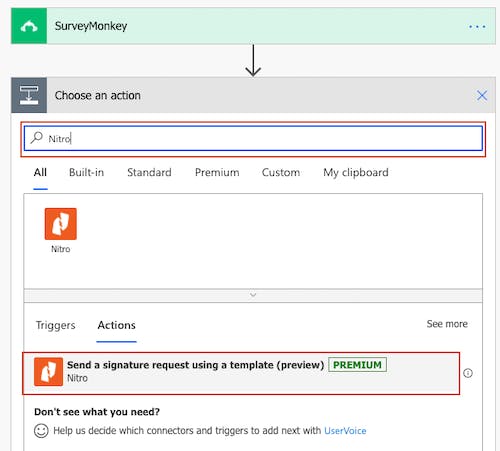
3. Click + New step and search for Nitro, and then select the 'Send a signature request using a template' action 
4. Select the template you want to use from your Nitro Sign saved templates and input all the required data fields. You can use data from your trigger event here 
5. Once you have built and saved your flow, a signature request using the selected template will be sent from your Nitro Sign account each time your trigger criteria is met
Note: Existing third-party sign integrations create single-document workflows. Nitro Sign shows all workflows that users create with these integrations in the Single documents tab of the applicable Nitro Sign section.