Step 1: Create a new application on Okta
1. Log in to the Okta Admin Console.
2. From the left navigation pane, select Applications.
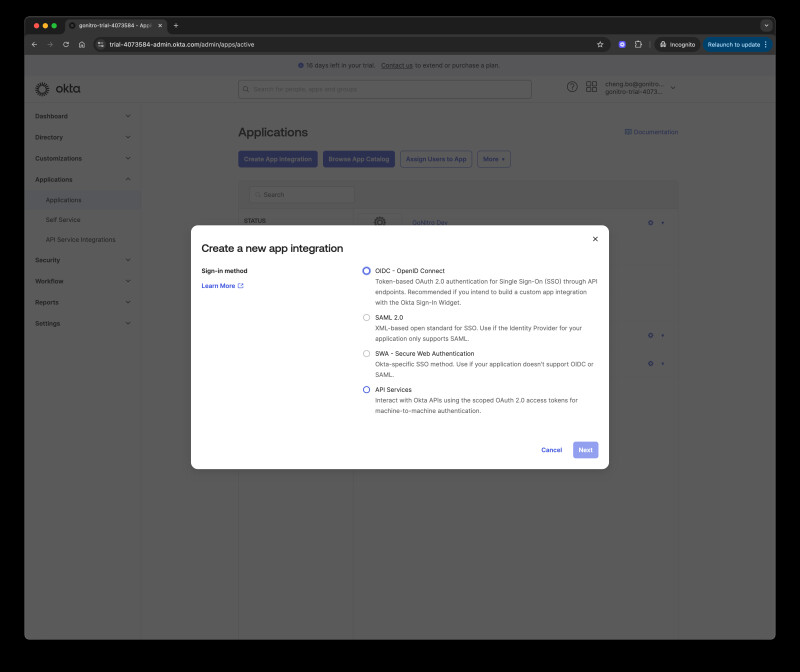
3. Click Create App Integration.

4. In the Create a new app integration panel, select SAML 2.0 and click 'Next.'
5. On the General Settings step
- Enter an Application Name (e.g. Nitro SSO)
- Upload the Nitro Logo (Download Nitro Logo)

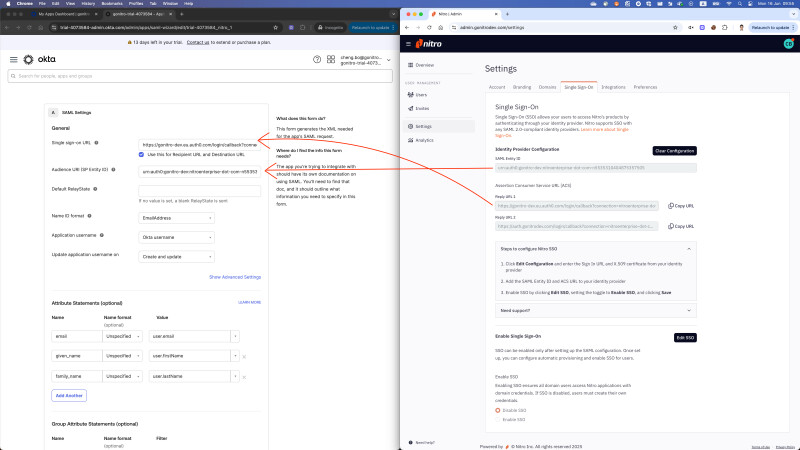
6. On the 'Configure SAML' step
- Under SAML Settings, enter the following placeholder values:
- Single Sign-On URL: https://gonitro-prod.eu.auth0.com/login/callback
- SP Entity ID:placeholder
These will be updated later in Step 3.
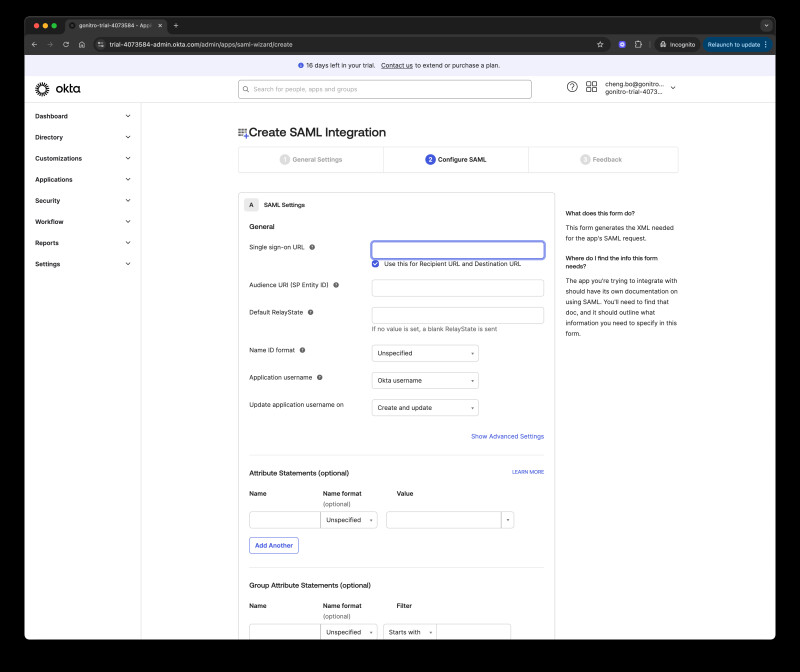
7. Under Attribute Statements, map the following fields:
| Name | Value |
| user.email | |
| given_name | user.firstName |
| family_name | user.lastName |
8. Click Next through the remaining steps to complete the app creation.
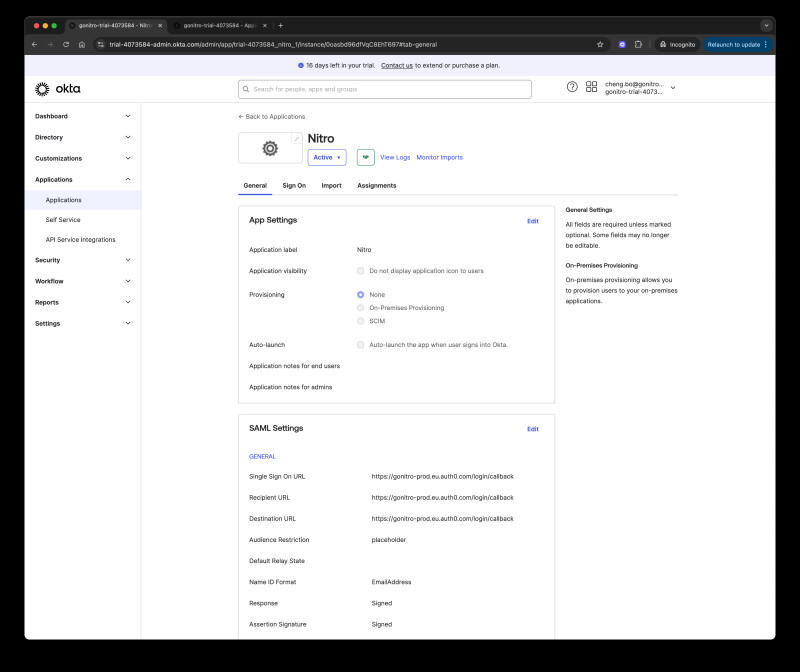
9. Go to the Sign On tab of the newly created application.
10. Under Metadata Details:
- Download the Signing Certificate
- Copy the Sign on URL
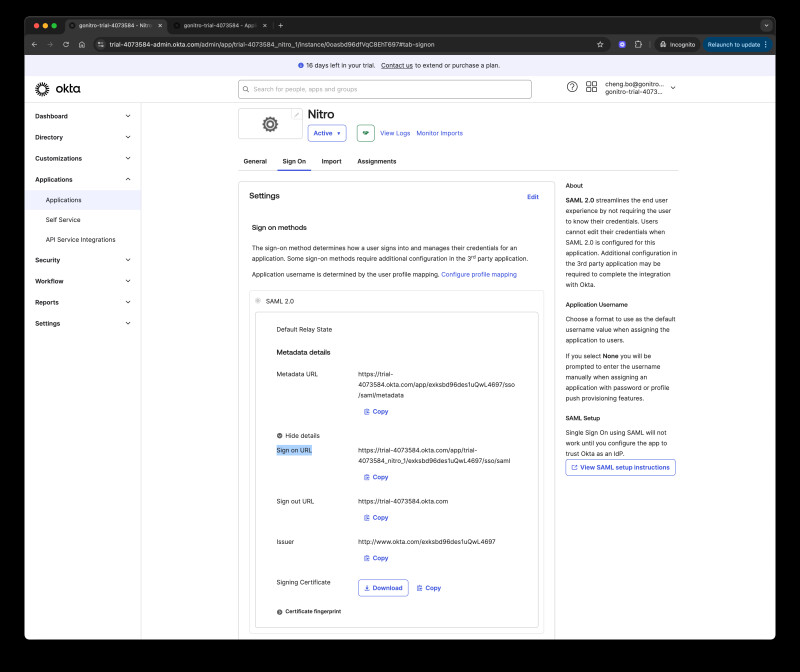
11. Rename the certificate file extension from .cert to .cer before uploading to Nitro Admin Portal.
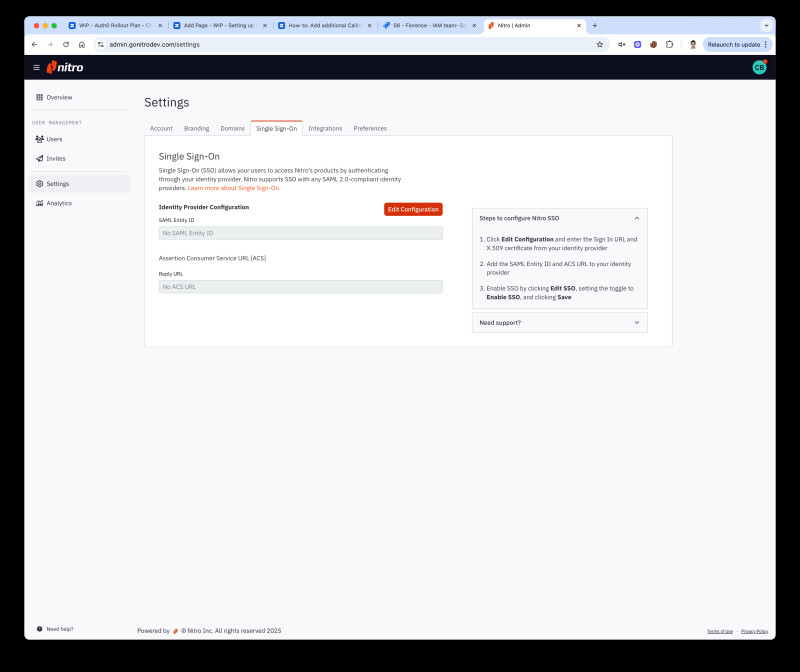
Step 2: Set Up SAML SSO in the Nitro Admin Portal
1. Log in to the Nitro Admin Portal
2. From the left navigation pane, go to Settings, then navigate to the Single Sign-On tab.
3. Click Edit Configuration
3. Paste the Sign on URL copied from Okta into the Sign-in URL field.
4. Upload the Signing Certificate downloaded from Okta into the X.509 Signing Certificate field. (Make sure the certificate file extension .cer before uploading)
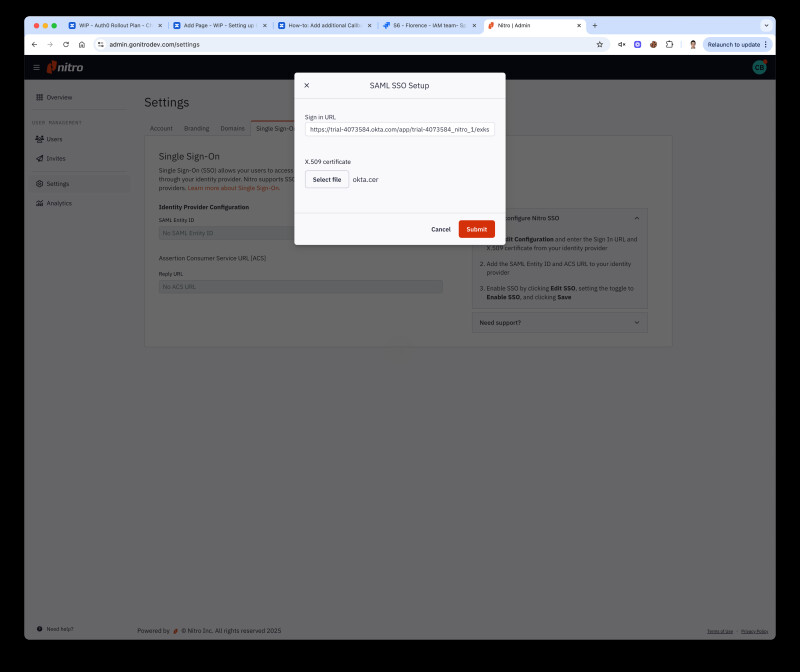
5. Click Submit and Enable SSO, then click Save.
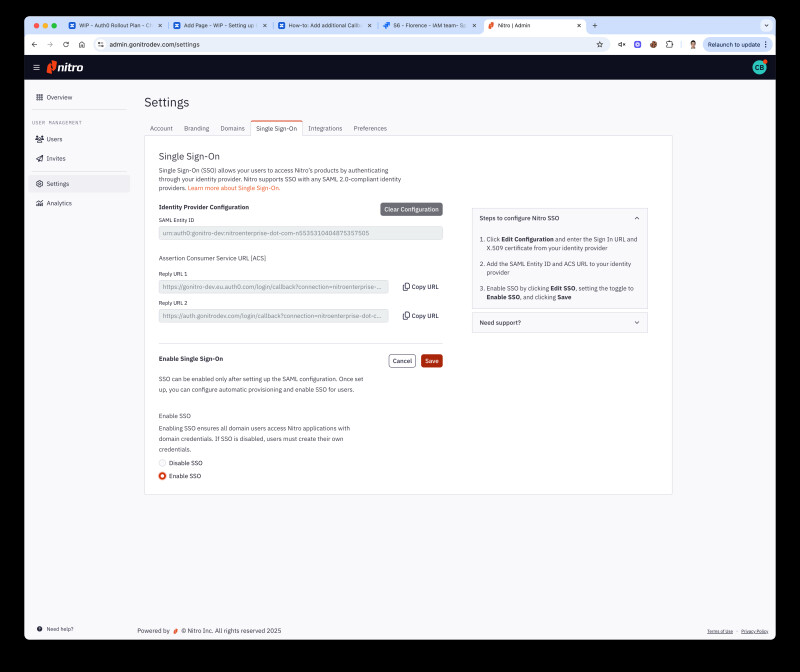
6. Copy the following values for use in the next step:
- Entity ID
- Reply URL 1
- Reply URL 2
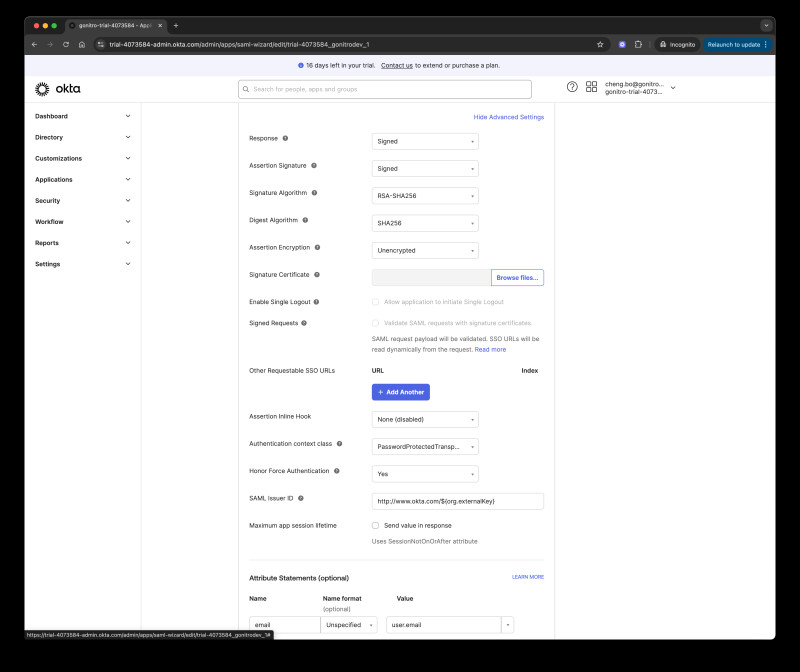
Step 3: Update SAML Settings in Okta
1. Go back to Okta Admin Console.
2. Navigate to Applications > Nitro SSO App > Sign On tab, Click Edit on SAML Settings
3. Update the placeholder values using the values copied from Nitro Admin:
- Paste SAML Entity ID to Audience URI (SP Entity ID)
- Paste Reply URL 1 to Single sign-on URL
4. Paste and Reply URL 2 to Other Requestable SSO URLs
Okta does not support query parameters (e.g., ?connection=xxxx) in the Requestable SSO URL. Therefore, only add: https://auth.gonitro.com/login/callback
5. Save Changes
6. Click General Tab
7. Click Edit on App Settings
8. Set Provisioning to On-Premises provisioning
9. Click Save