Add or Edit Text in a PDF
Nitro PDF Pro for Windows
Nitro Pro includes tools so you can add new text to a PDF document, or make last-minute corrections and updates, without the need to re-open the source files in the authoring program.
The Type Text tool lets you add text anywhere on a PDF document, even if it does not have interactive fields. It gives you full control over the text color, font type, and text size. For example, if you obtain a PDF form created from a photocopy or scan of a paper form, you do not need to print the form and then write information on the paper. Instead, you can use the Type Text tool to enter text as an annotation on the form.
You can use the Edit tool to update and move existing blocks of text as a paragraph inside a bounding-box, and do not have to manage paragraphs as a collection of separate lines. As you edit text or resize the bounding-box while editing, text re-flows
naturally onto adjacent lines.
Tip: Text re-flow is supported in paragraphs, and treats them as separate objects. To move a paragraph, use the Edit tool.
Nitro Pro includes tools so you can add text to each page in your document in the form of headers and footers, and Bates numbers for unique page numbering. For more information, see Headers and footers & Bates Numbers.
Note: If you plan to make many small or several major text corrections to a document, we recommend you go back to the source file and make the changes there. This gives more precise control over the exact layout and look, and there may be an opportunity to automate the corrections to save time. Alternatively, Convert PDF to Microsoft Word or Convert PDF to Rich Text to create an editable DOC or RTF file.
TIP : When you type text, it is inserted on the annotation layer by default. To insert text on the content layer, Ctrl-click the page where you want to insert text. For more information, see Annotation layer and content layer.
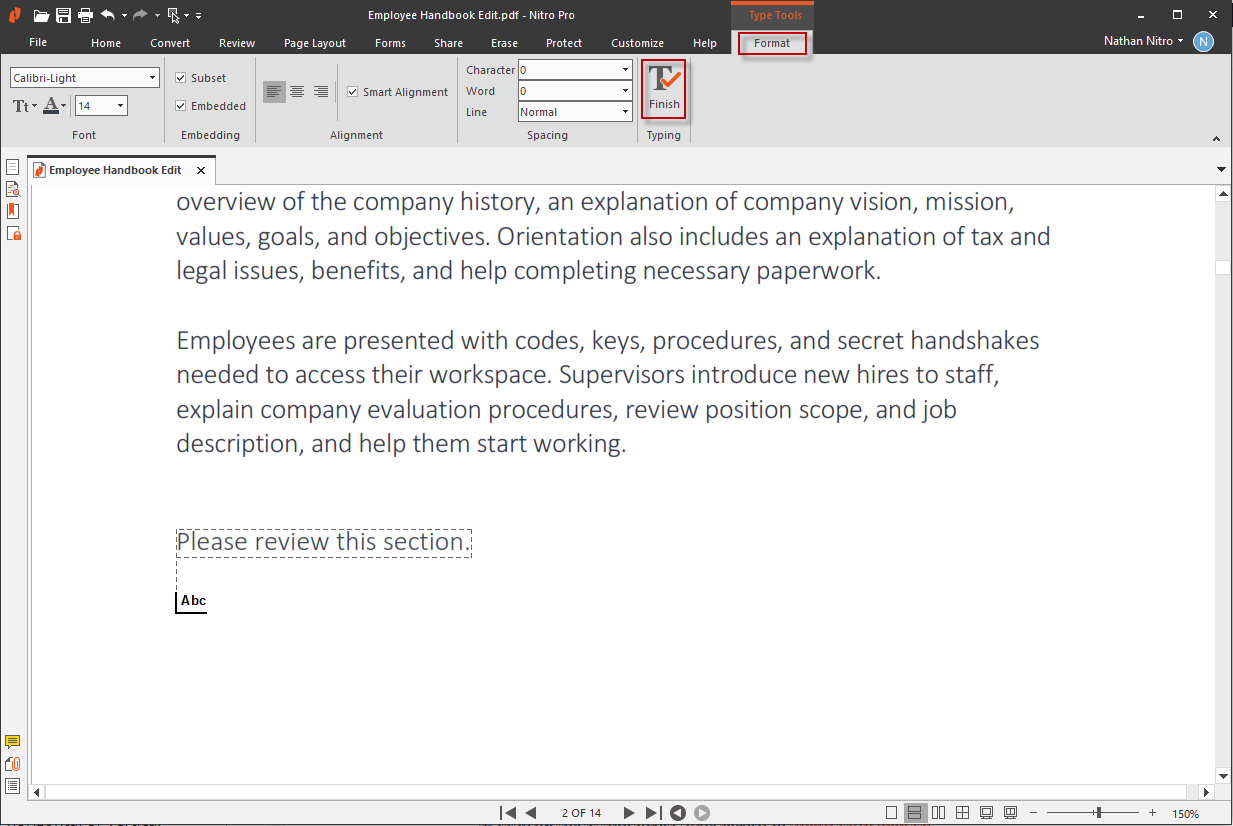
When enabled, Smart Alignment provides visual markers that make it easy to align new text to other phrases, annotations, or images on the page before you begin typing. With the Type Text tool selected, the cursor will snap to the horizontal or vertical guides depending on where you position your mouse.
If Nitro Pro cannot determine a related font, it uses a generic font. We advise you to confirm that selected fonts are similar in appearance, and apply another font if necessary. For more information, see Embedded fonts.
To move text, click the Edit tool on a paragraph or heading to select it, and do one of the following:
Moving text from the annotation layer to the content layer is known as flattening text.
To flatten text, do one of the following:
For more information, see Annotation layer and content layer.
The Type Text tool lets you add text anywhere on a PDF document, even if it does not have interactive fields. It gives you full control over the text color, font type, and text size. For example, if you obtain a PDF form created from a photocopy or scan of a paper form, you do not need to print the form and then write information on the paper. Instead, you can use the Type Text tool to enter text as an annotation on the form.
You can use the Edit tool to update and move existing blocks of text as a paragraph inside a bounding-box, and do not have to manage paragraphs as a collection of separate lines. As you edit text or resize the bounding-box while editing, text re-flows
naturally onto adjacent lines.
Tip: Text re-flow is supported in paragraphs, and treats them as separate objects. To move a paragraph, use the Edit tool.
Nitro Pro includes tools so you can add text to each page in your document in the form of headers and footers, and Bates numbers for unique page numbering. For more information, see Headers and footers & Bates Numbers.
Note: If you plan to make many small or several major text corrections to a document, we recommend you go back to the source file and make the changes there. This gives more precise control over the exact layout and look, and there may be an opportunity to automate the corrections to save time. Alternatively, Convert PDF to Microsoft Word or Convert PDF to Rich Text to create an editable DOC or RTF file.
Add text:
- On the Home tab, in the Tools group, click Type Text

- To type text, click the page where you want to insert text
- On the Format tab, use the text options to set the appearance of the text, such as the font and size

- Enter your text, and press Escape or click Finish when complete
- If spell check highlights an error, right-click the text to see a suggestion or to change the spellcheck language
TIP : When you type text, it is inserted on the annotation layer by default. To insert text on the content layer, Ctrl-click the page where you want to insert text. For more information, see Annotation layer and content layer.
Type Text Smart Alignment
When enabled, Smart Alignment provides visual markers that make it easy to align new text to other phrases, annotations, or images on the page before you begin typing. With the Type Text tool selected, the cursor will snap to the horizontal or vertical guides depending on where you position your mouse.
Enable/ disable Smart Alignment
- On the Home tab, click Type Text
- Click on the document page to start typing, the Format tab will appear
- In the Alignment group, check Smart Alignment to enable alignment

- Uncheck Smart Alignment to disable alignment
Edit Text
- Click the Edit button located on the left-hand side of the ribbon

- Double-click text, and position the cursor where you want to insert or edit text. As you type, the bounding-box resizes itself to fit text
- Highlighting text with your mouse reveals the floating toolbar that allows you to change the font, case, color, and size of the text. When you have finished editing the text, press Escape, click elsewhere on the page, or click Finish

- If spell check highlights an error, right-click the text to see a suggestion or to change the spell check language
If Nitro Pro cannot determine a related font, it uses a generic font. We advise you to confirm that selected fonts are similar in appearance, and apply another font if necessary. For more information, see Embedded fonts.
Move Text
To move text, click the Edit tool on a paragraph or heading to select it, and do one of the following:
- Drag the bounding-box to a new location
- Use the arrow keys on your keyboard to nudge the bounding-box in small increments

Delete a Paragraph or Image
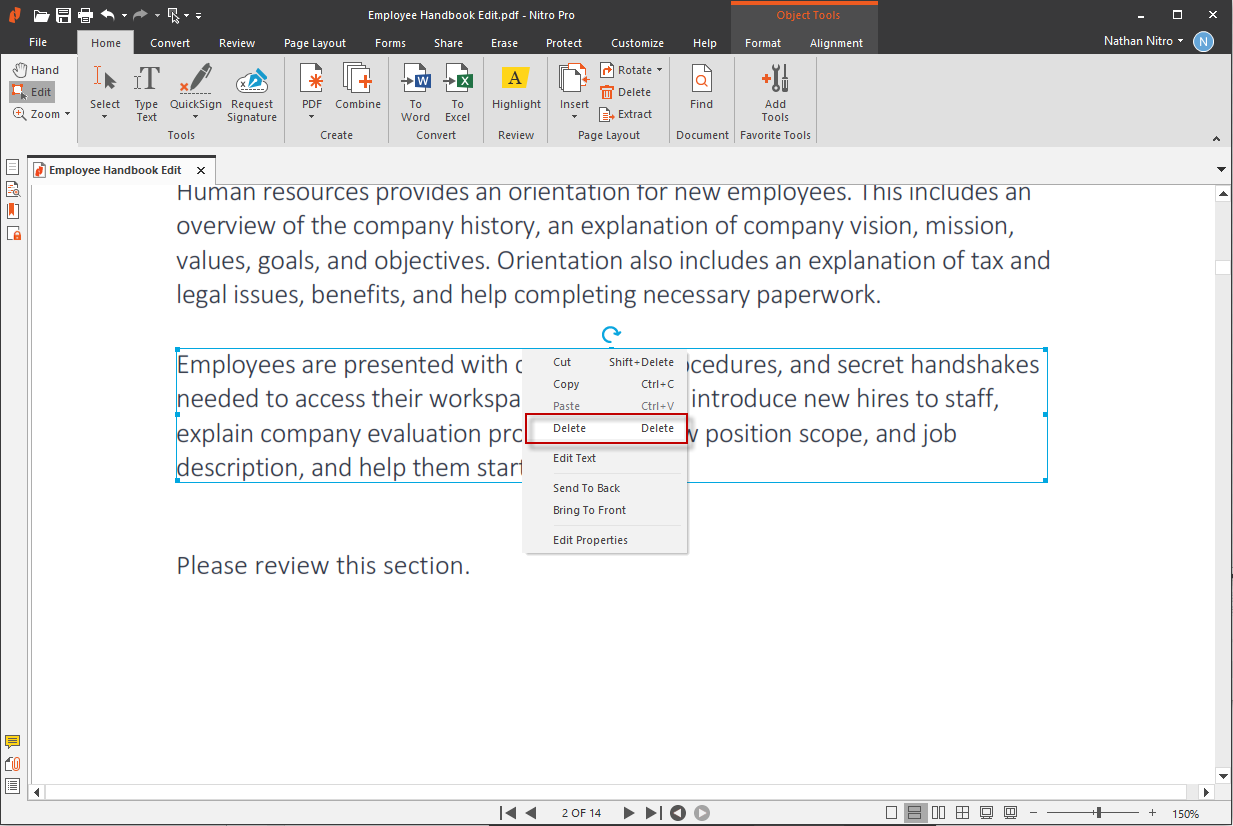
- Click on it once to show the light blue bounding-box for the text or image.
- Press Delete, or right-click on the text and select Delete from the menu.

Flatten Text
Moving text from the annotation layer to the content layer is known as flattening text.
To flatten text, do one of the following:
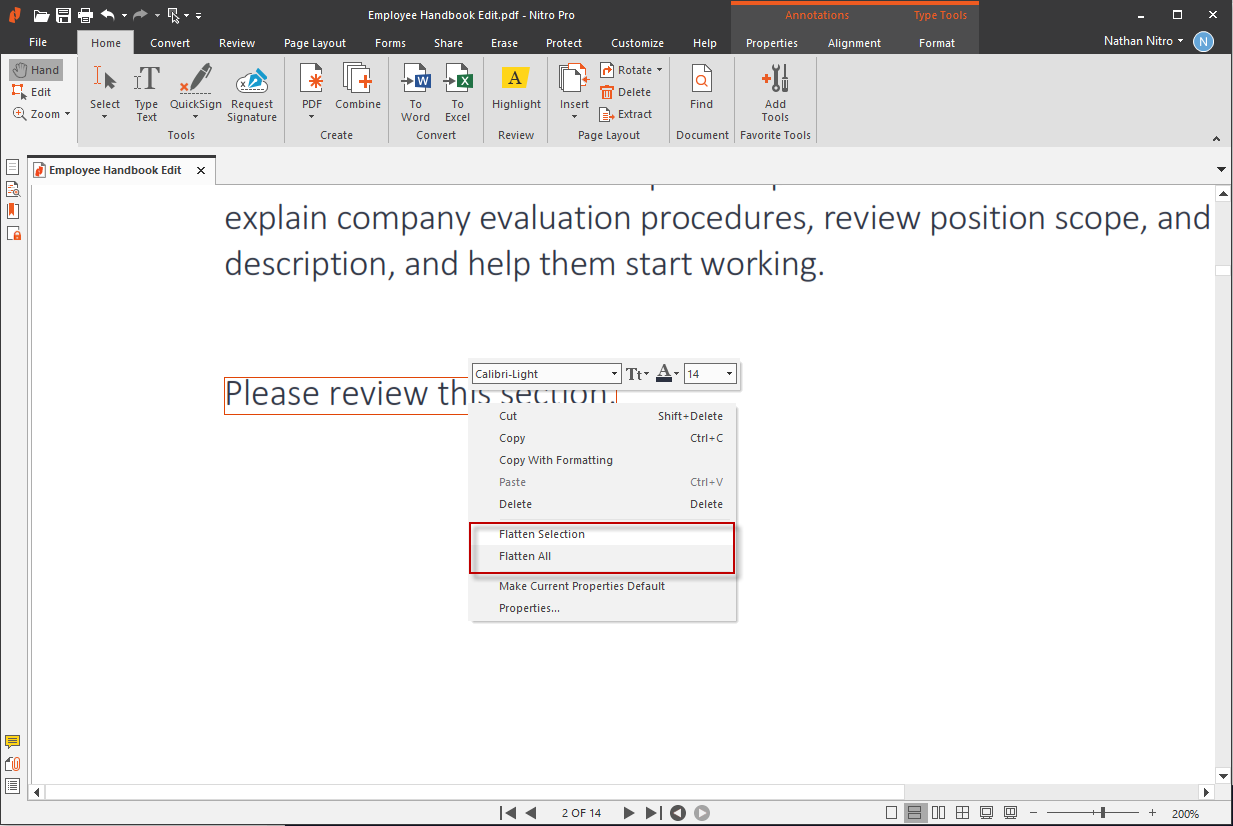
- To transfer a selected text annotation to the content layer, right-click on the text annotation, and select Flatten Selection from the menu
- To transfer all text from the annotation layer to the content layer, right-click on a text annotation, and select Flatten All from the menu

- To flatten all annotations from the annotation later to the content layer, and save the PDF file in one step, in File menu, select Save As, and then Flattened PDF. This flattens all annotations, including form fields, sticky notes, links, and other markup annotations.
For more information, see Annotation layer and content layer.