Print to PDF Creator
If you use an application that can print files, then you can also use that application to create PDF documents. Nitro PDF Creator is included in Nitro Pro, and is a virtual printer that enables you to create a PDF file from any application capable of printing. Nitro PDF Creator is ready to use without requiring any configuration, and is automatically installed to your Windows printer manager.

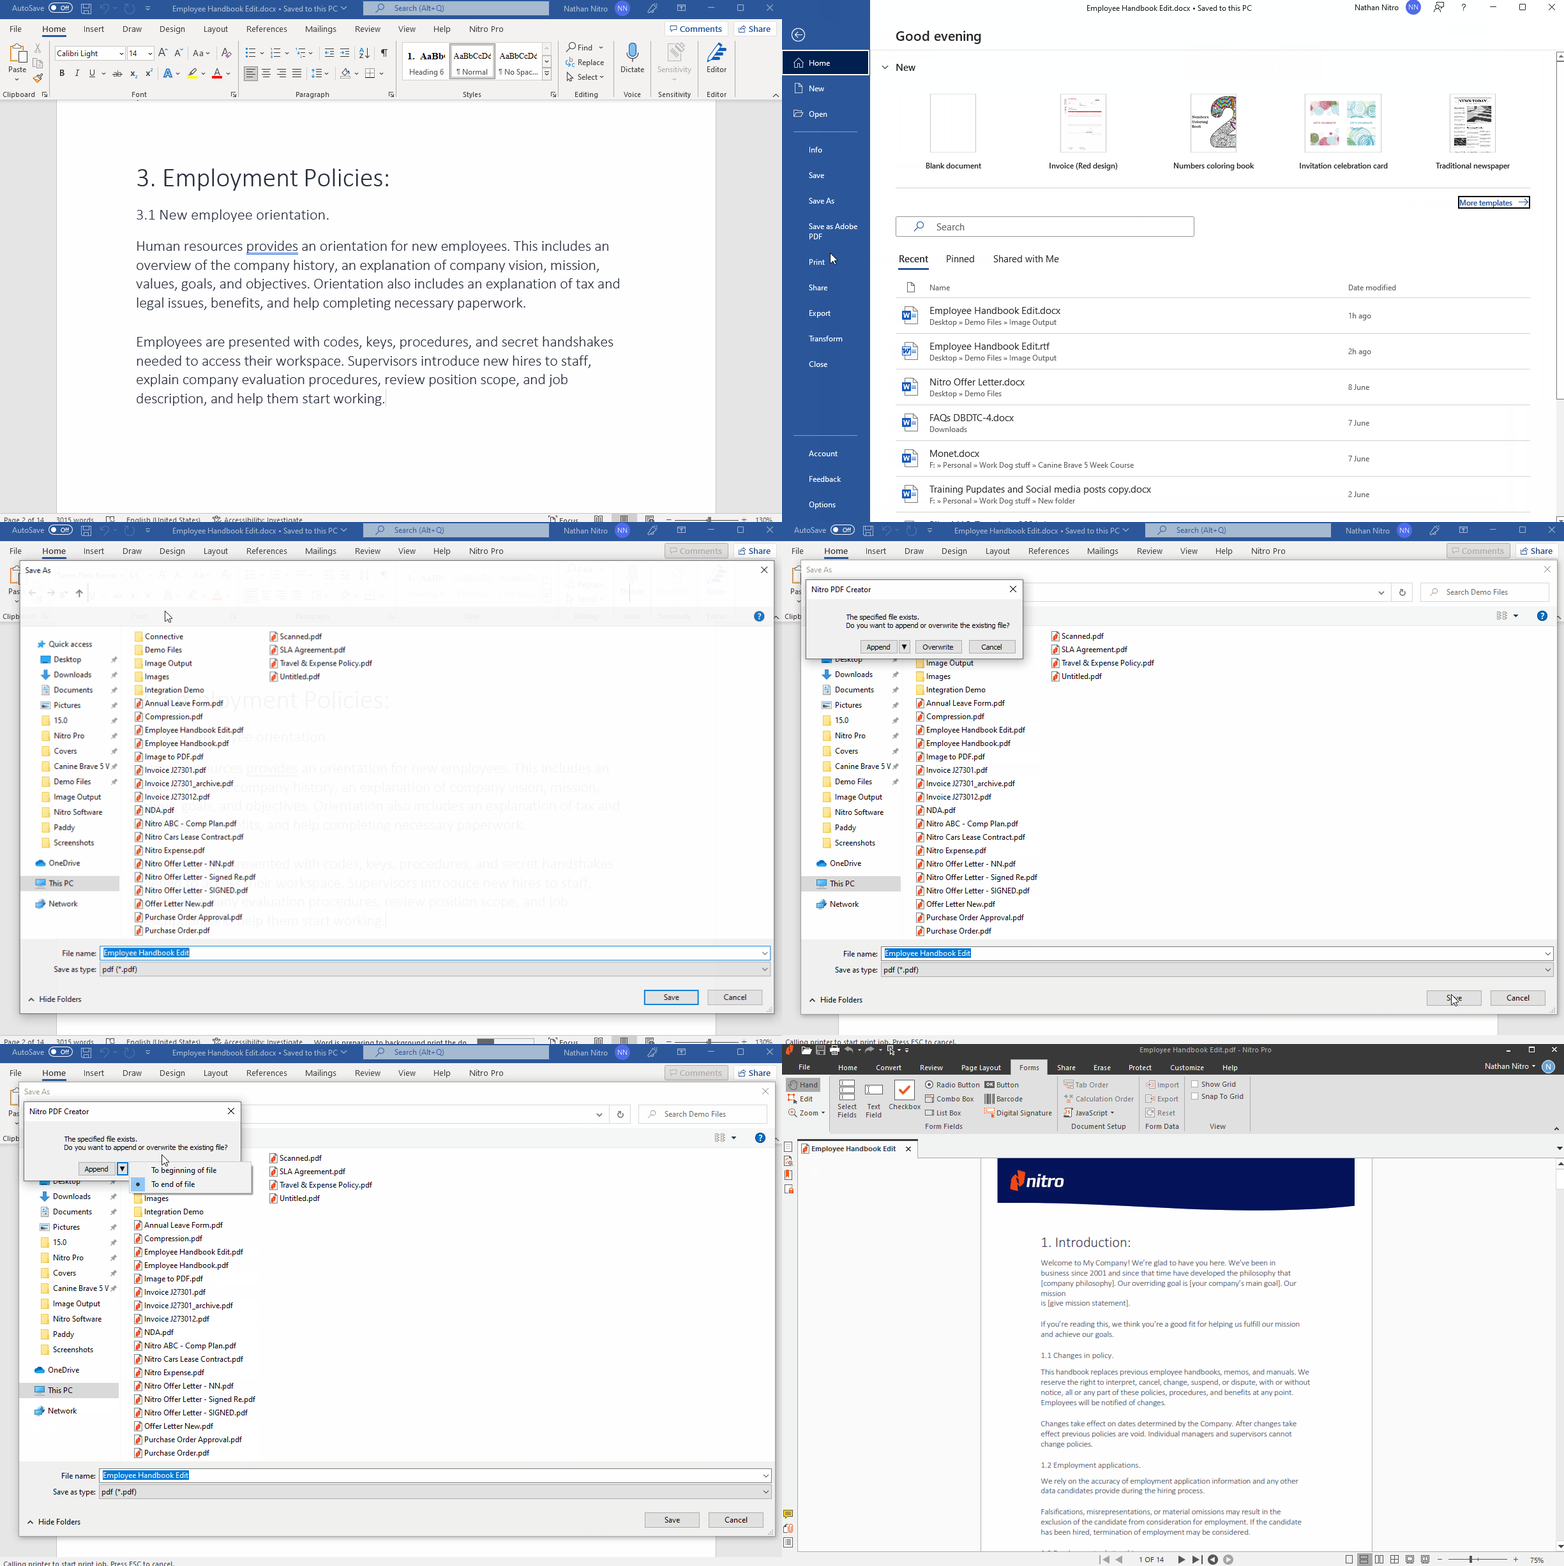
Tip : To append your document to an existing PDF file, save the new PDF file to the same folder and file name as the original PDF document. Nitro PDF Creator asks you whether you want to insert it at the beginning of the exiting file, add it at the end, overwrite the original file, or cancel.

Tip : To view document properties in Nitro Pro, in the File menu, click Document Properties.
For more information about PDF document properties, see The Nitro PDF Creator Printing Preference dialog in Nitro PDF Creator Preferences.
To print a document to Nitro PDF Creator
- Open the document you wish to convert in its authoring program. For example, a Word document in Microsoft Word, or online content in your web browser.
- Most applications have a Print command in the File menu. Select it, or press Ctrl+P.
- From the printer list, choose Nitro PDF Creator by clicking once on it, and then: The Create PDF dialog opens.
- Click Create

Tip : To append your document to an existing PDF file, save the new PDF file to the same folder and file name as the original PDF document. Nitro PDF Creator asks you whether you want to insert it at the beginning of the exiting file, add it at the end, overwrite the original file, or cancel.
Set the Document Properties
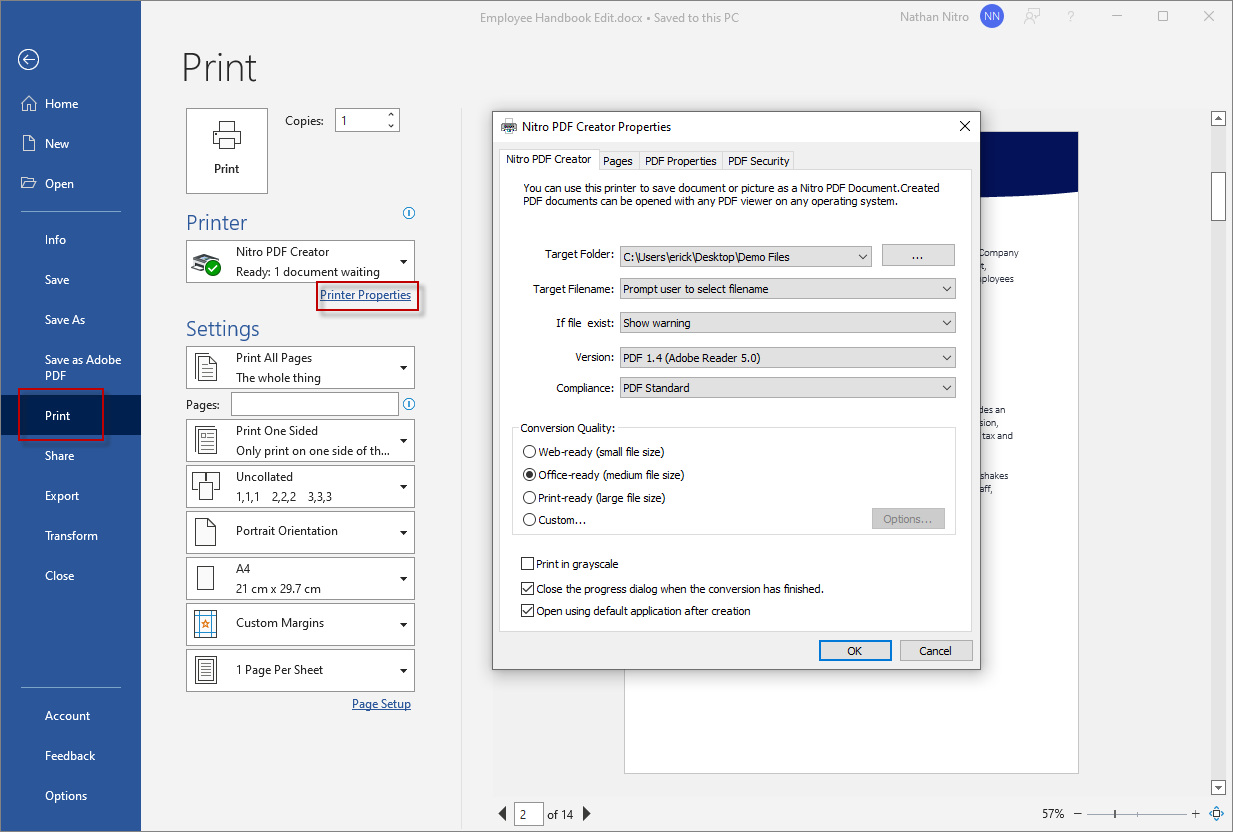
When you create a PDF document by printing a file with Nitro PDF Creator, you can specify properties of the PDF document.- In the Print dialog, click Printer Properties. The Nitro PDF Creator Properties dialog appears
- Specify the document properties, and click OK to return to the Print dialog.

Tip : To view document properties in Nitro Pro, in the File menu, click Document Properties.
For more information about PDF document properties, see The Nitro PDF Creator Printing Preference dialog in Nitro PDF Creator Preferences.