With Nitro Pro, it is possible to create PDF documents from over 300 different types of files. PDF creation can easily be done within and outside of Nitro Pro, and without having to open the native application of the file (which must be installed on your system). When Nitro Pro is installed, it automatically sets up Nitro PDF Creator, a virtual printer to extend PDF creation to any software capable of printing.
For more information, see Print to Nitro PDF Creator.
TIP : To use original settings from the PDF file, click Reset.
For more information, see Print to Nitro PDF Creator.
To create a PDF document:
To create a portfolio please see the Create a PDF Portfolio section of this guide.- On the Home tab, in the Create panel, click PDF > From File. The Create PDF Files dialog appears.
- Click Add Files, locate the file(s) you want to convert, and click Open
- Click and drag the files to visually define the order in which they will be converted
- Click the Settings button and select one of the following options from the Make PDF files menu:
- Click the Settings button and select one of the following options from the Folder menu:
- Check PDF/A-1b compliance to create an archival standard PDF file
- If you want to automatically open the new PDF after it is created, check the Open PDF files after creation checkbox
- Click Create
Custom PDF creation settings
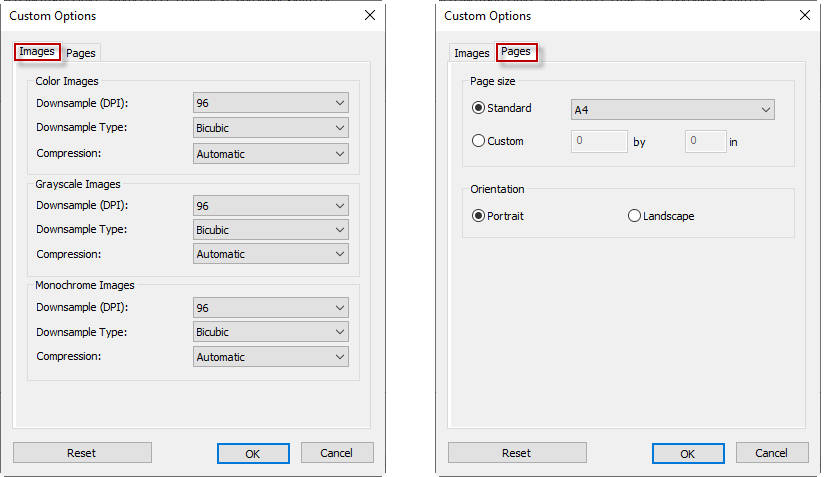
When creating a PDF document with the Create PDF Files dialog, click Settings and then click the Make PDF files menu. Click Custom, and then click the Options button to control quality and compression. The Custom Settings dialog appears:- Images tab: Specify custom settings for image optimization, depending on the types of images in your document:
- Pages tab: Specify custom page sizes and orientation:
TIP : To use original settings from the PDF file, click Reset.