Create a PDF document from any file of Nitro Pro, and without having to open the native application of the file (which must be installed on your system). When Nitro Pro is installed, it automatically sets up Nitro PDF Creator, a virtual printer to extend PDF creation to any software capable of printing.
For more information, see Print to Nitro PDF Creator.
How to create a PDF document:
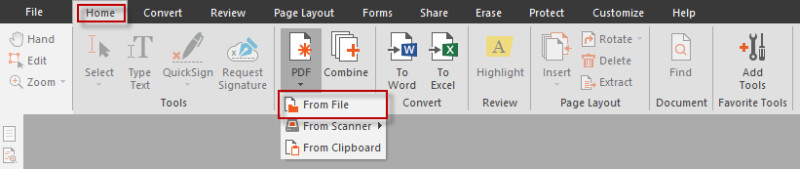
1. On the Home tab, in the Create panel, click PDF > From File. The Create PDF Files dialog appears.
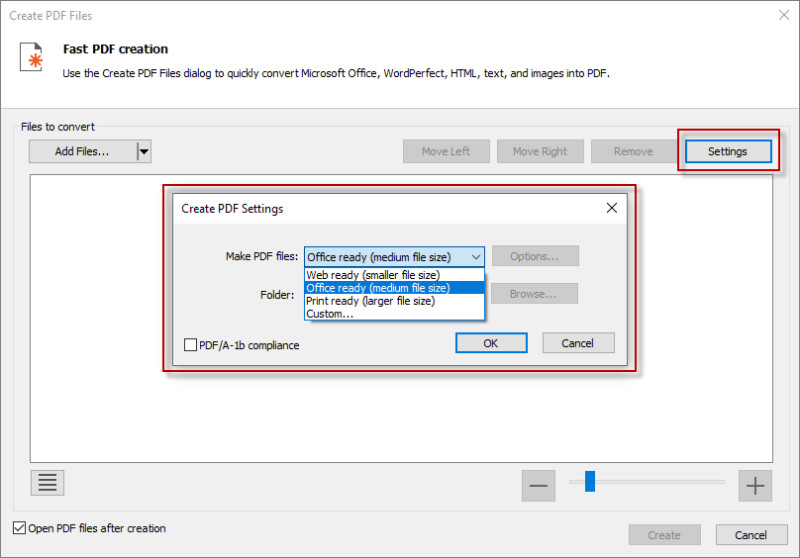
2. Click Add Files, locate the file(s) you want to convert, and click Open
3. Click and drag the files to visually define the order in which they will be converted
- You can change the view mode from a List to Thumbnails by clicking the button beneath the file viewer. The zoom controls only work when thumbnail view is used.
4. Click the Settings button and select one of the following options from the Make PDF files menu:
- Web ready: Optimizes the PDF file size for browser viewing and fast downloads
- Office ready: Optimizes the PDF file for satisfactory office printing quality
- Print ready: Optimizes the PDF file for maximum quality when processed on professional printers
- Custom: Configure your PDF output settings manually (see the settings explained in the Custom PDF creation settings section below).
5. Click the Settings button and select one of the following options from the Folder menu:
- Specific folder: Select a location to save the PDF file before it is created
- Folder of original file: The new PDF file is saved in the same location as the source file
- Ask during the process: Specify a location for the PDF file after it is created
6. Check PDF/A-1b compliance to create an archival standard PDF file.
7. If you want to automatically open the new PDF after it is created, check the Open PDF files after creation checkbox.
8. Click Create.
Custom PDF creation settings
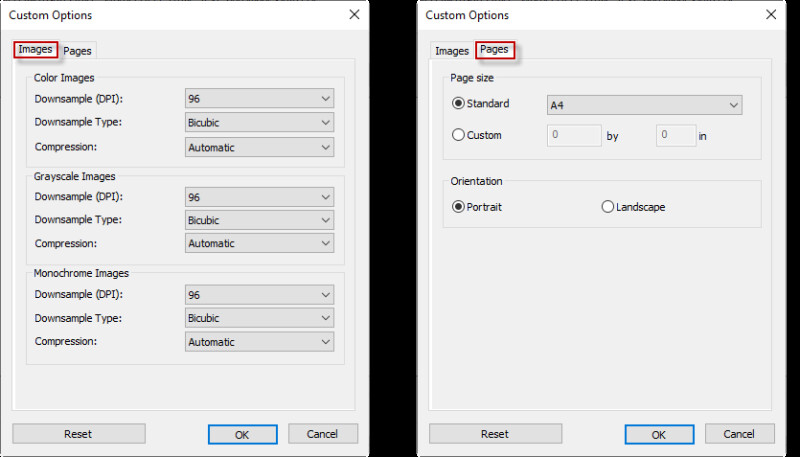
When creating a PDF document with the Create PDF Files dialog, click Settings and then click the Make PDF files menu. Click Custom, and then click the Options button to control quality and compression. The Custom Settings dialog appears:
- Images tab: Specify custom settings for image optimization, depending on the types of images in your document:
- Convert color images to grayscale: Change color images to grayscale
- Convert grayscale images to monochrome: Change color images to black and white
- Monochrome Images: Downsampling and compression options for monochrome images
1. Downsample: Specify the number of dots per inch to be used in rendering each image. Setting this to a lower number reduces file size, but also reduces the quality of your printed images.
2. Compression: Specify the compression method. If you select Automatic, Nitro Pro uses the best compression type to suit the majority of images in the document. You can experiment with different settings to find the optimal balance between file size and image quality. JPEGand JPEG2000 are lossy compression methods, meaning that the decompression of a compressed image results in some loss of quality. The ZIP compression algorithm, on the other hand, is lossless.
3. Image Quality: If you select JPEG compression, you can specify the image quality, depending on how your document will be used. Higher image quality results in larger file sizes.
- Pages tab: Specify custom page sizes and orientation:
- Page size: Select from the list of standard sizes, or enter the required dimensions and specify a Custom size
- Orientation: Choose a portrait or landscape orientation for the PDF document
TIP: To use original settings from the PDF file, click Reset.