This guide outlines the steps needed to set up the iManage server to communicate with Nitro PDF Pro.
In iManage Control Center (IMCC) add Nitro Pro to the allowed applications:
0127f653-a333-483f-b6b4-fb452b5959a7
Client Secret / API Secret
<autogenerated>
Redirect URL
http://localhost/
Application Type
Native
Fore more information on IMCC and applications, click here.
Step 1: Add Nitro PDF Pro to the allowed apps on the iManage Server
Note: if you have more than one iManage server, this step must be done on each iManage server.In iManage Control Center (IMCC) add Nitro Pro to the allowed applications:
- if you use an account on cloudimanage.com: select and add Nitro Pro from Application List
- if you use another iManage 10.2+ server (cloud or on-premises): add Nitro Pro manually with predefined Client ID:
Client ID / API Key
0127f653-a333-483f-b6b4-fb452b5959a7
Client Secret / API Secret
<autogenerated>
Redirect URL
http://localhost/
Application Type
Native
Step 2: Register Nitro PDF Pro as an integrated application
Note: if you have more than one iManage server, this step must be done on each iManage server.- Download imWorkOptions.xml file from IMCC. If there is no such file, the template can be downloaded from iManage Help Center or created manually.
- In imWorkOptions.xml, add the section that marks Nitro Pro as integrated application:
<ws_options> <ws_option name="integration"> <key name="IntegratedProcesses" value="NitroPDF"/> </ws_option> </ws_options> IMPORTANT: ensure that “<ws_options>” does not contain attribute “applyToAll”. If this attribute exists – please, remove it. The value of “IntegratedProcesses” has to be exactly “NitroPDF” as it corresponds to the name of Nitro PDF Pro process on a client.
- Upload the result document back to the IMCC.
- To update the configuration on a client side, it is required to reconnect to the iManage server.
Step 3: Setup the client side
On client workstations:- Ensure that iManage Work Desktop for Windows 10.5 or newer (also known as iManage Agent) is running and connected to the iManage server.
- Before installing Nitro Pro, generate MST file with iManage integration enabled by Nitro Pro Deployment Tool:
IMPORTANT: The path must be set to Work subfolder where Nitro Pro can find iManage dlls. If iManage Install Path is missing, Nitro Pro integration with iManage will not work and this may lead to the situation when the documents opened from web-client will remain checked out until manual check in. - Install Nitro Pro with created MST file. For more details see Page 3 “How to enable iManage integration with Deployment Tool”.
- Set Nitro Pro as a default PDF viewer
How to Enable iManage Integration with the Deployment Tool
Step 1: Preconditions
- Uninstall the previous version of Nitro PDF Pro.
- Download Nitro PDF Pro installer and related to it Deployment Tool.
NOTE: it is important to have Deployment Tool of the same version as the Nitro Pro installer.
Step 2: Prepare MST file with enabled iManage integration
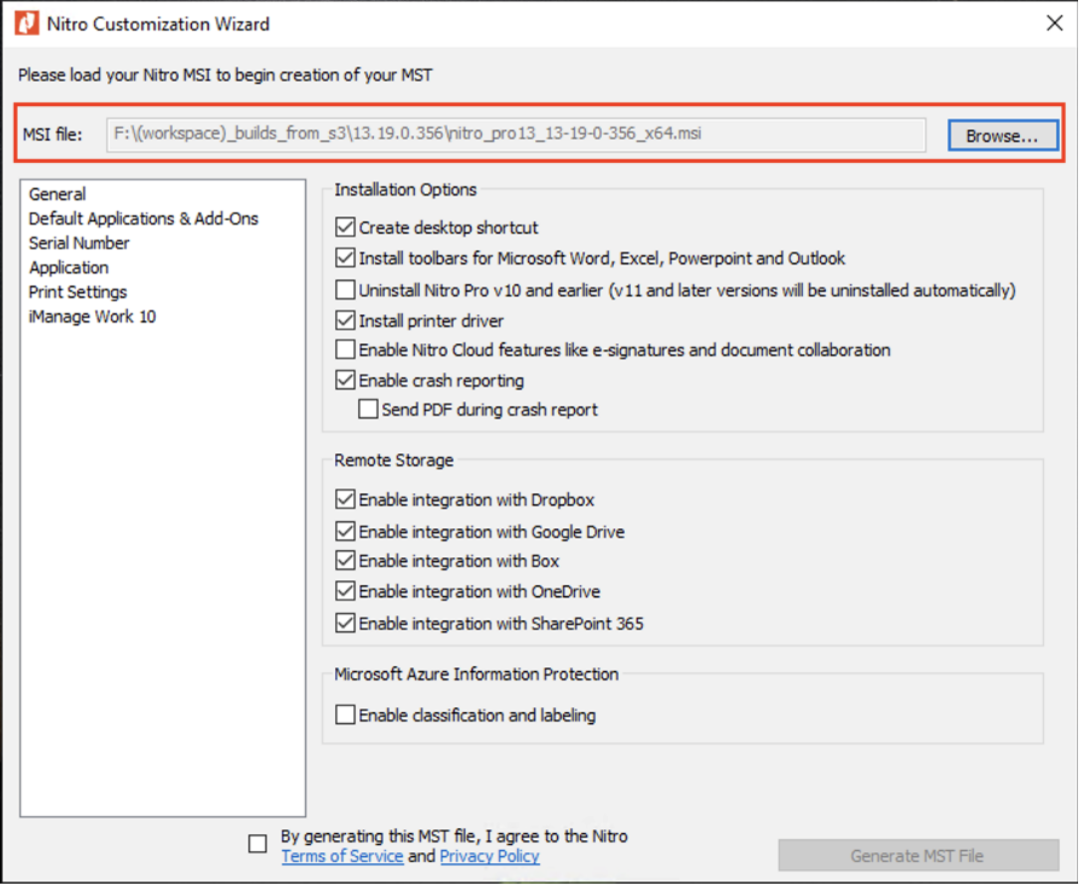
- Start Deployment Tool
- In a top right corner, click on a Browse... button and select the downloaded Nitro Pro installer (MSI file). For example:
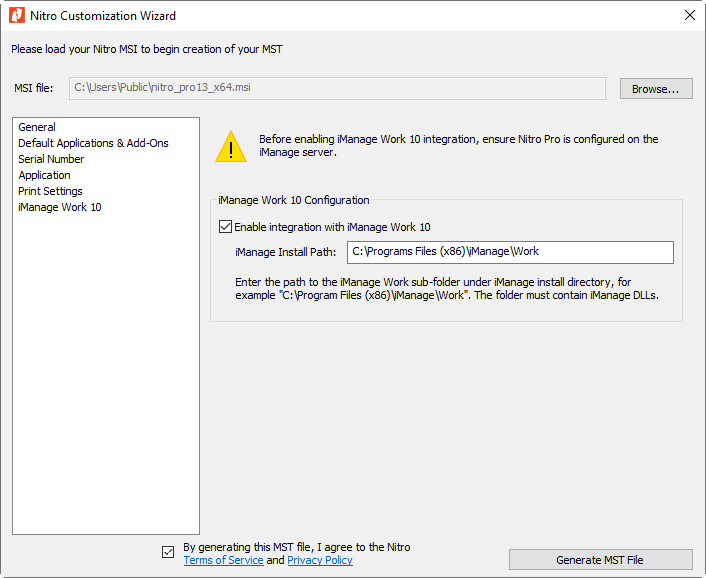
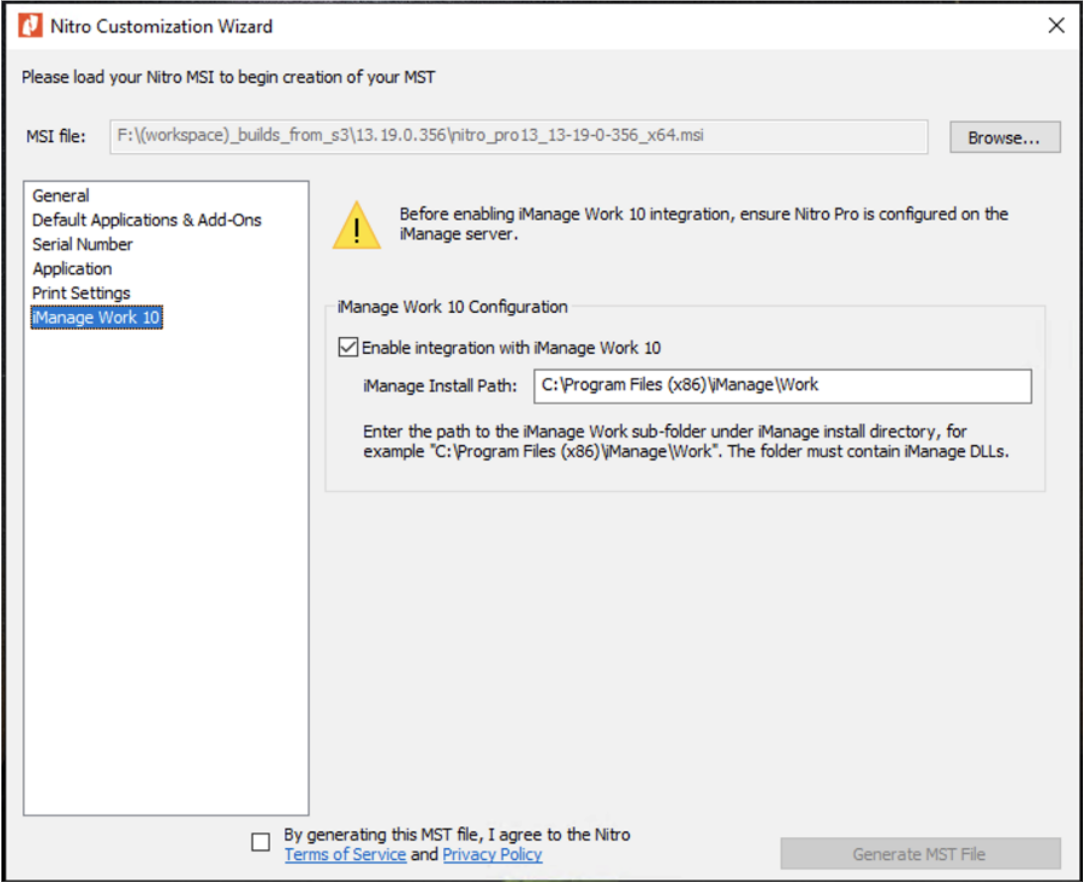
- On the lest panel, select iManage Work 10 section.
- Select check box Enable integration with iManage Work 10.
- In the edit field iManage Install Path set path to the Work subfolder under the iManage installation folder. NOTE: this subfolder must contain the iManage DLLs. For example:
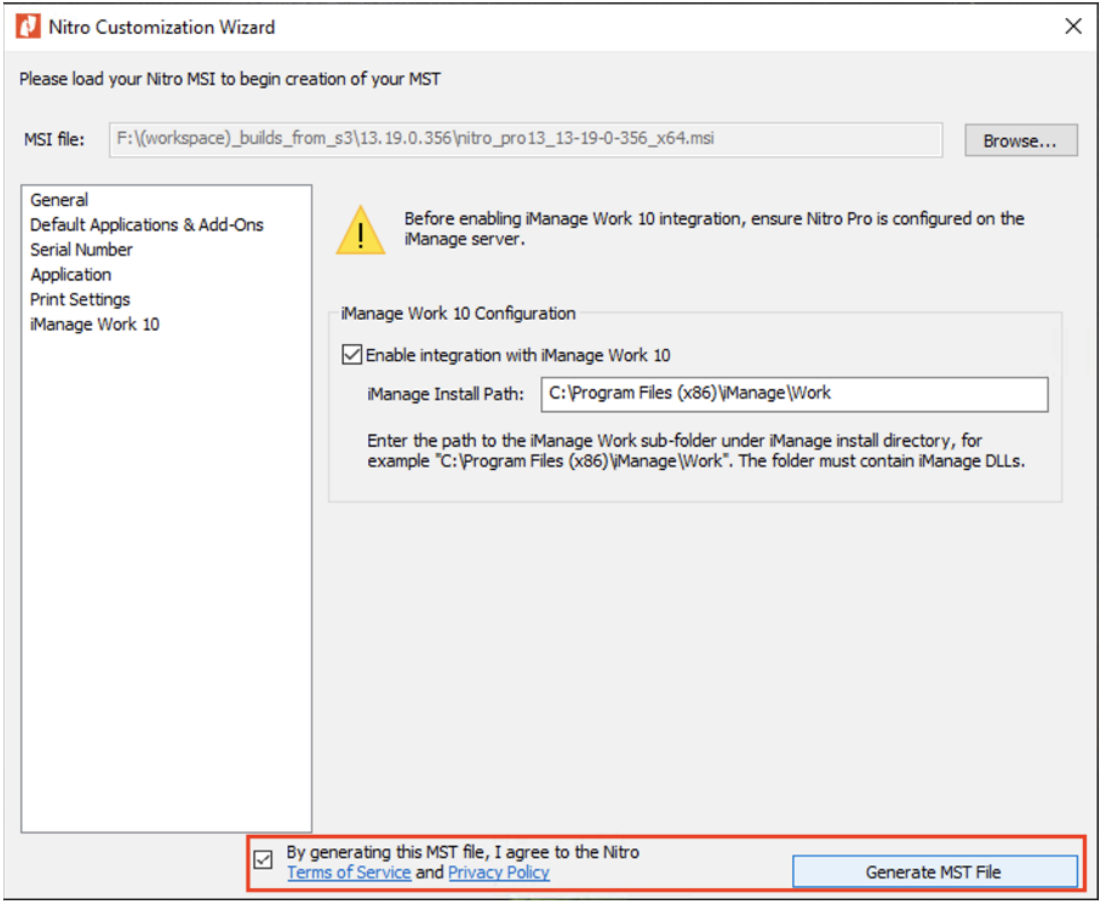
- At the bottom of the dialog, check the agreement check box and click “Generate MST File”. For example:
- When MST is generated successfully the message will appear with the path to the MST file.
- [IMPORTANT] Close the deployment tool dialog.
Step 3: Install Nitro Pro with applying the MST file/h5>
- Open CMD (Windows command line).
- Install Nitro Pro using this command line format:

NOTE: It is important to spell TRANSFORMS correctly – otherwise MST will not be applied. If the path contains spaces, it should be wrapped into the double quotes “”.
- Just follow the installer steps as normal.
Last updated: June 2026