
This guide outlines the steps needed to set up the Azure Information Protection in Nitro PDF Pro.
Step 1: Deploy Nitro Pro with Azure Information Protection enabled on a client-side
- Download Nitro PDF Pro installer.
- Install Nitro PDF Pro: follow the installer steps as usual.
- After Nitro Pro is installed:
- Activate Nitro PDF Pro
- Close Nitro PDF Pro
- In the registry, enable AIP Classification and Labeling:
For v26:
[HKEY_LOCAL_MACHINESOFTWARENitroPDF ProCVsettings]
"MSAzureLabelingEnabled"=dword:00000001
For v14:
[HKEY_LOCAL_MACHINESOFTWARENitroPDF Pro14settings]
"MSAzureLabelingEnabled"=dword:00000001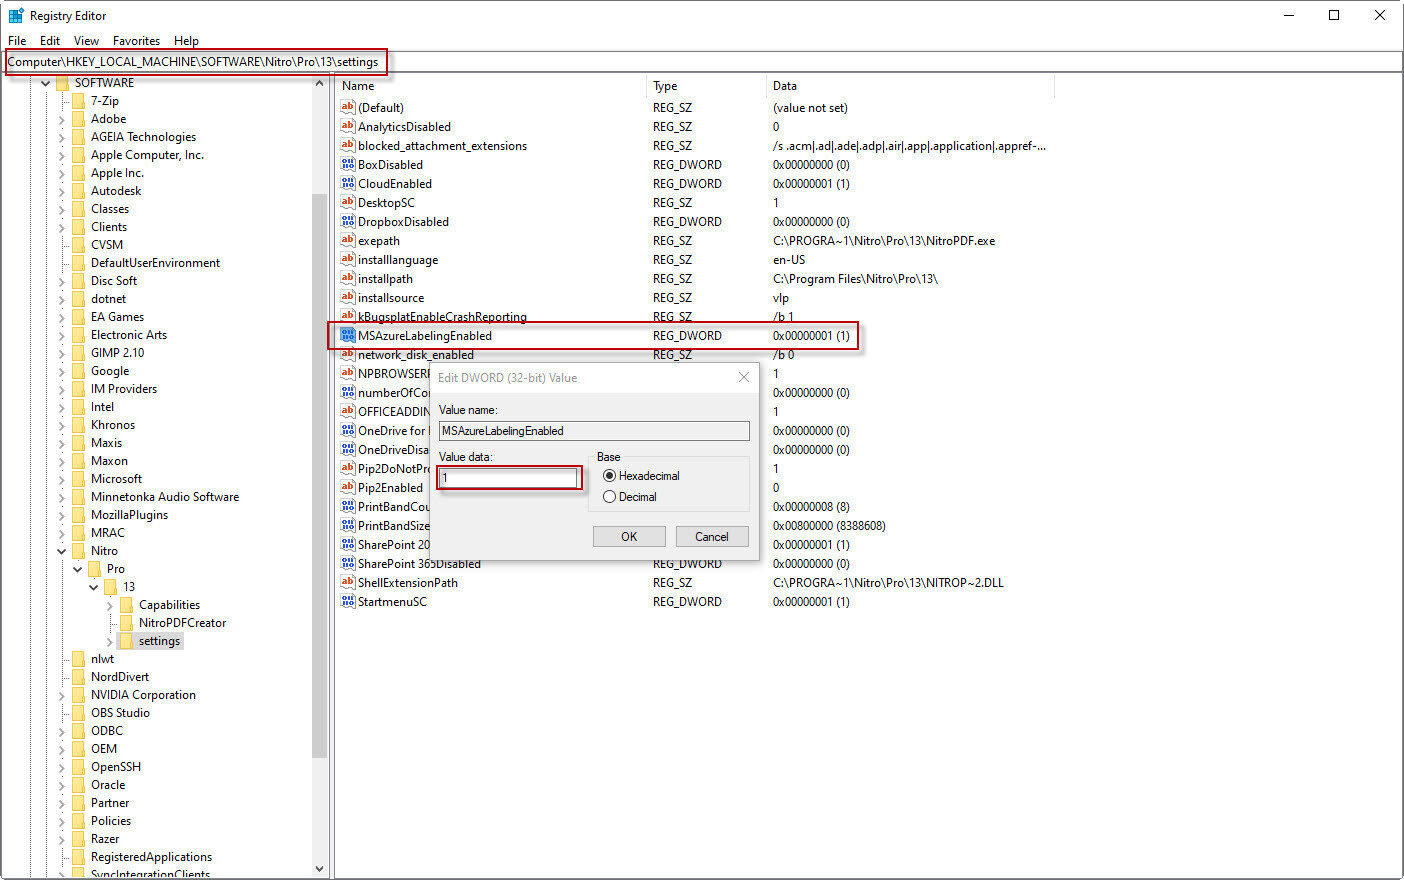
NOTE: the key must be enabled on each workstation where the users need to access Azure Information Protection features within Nitro PDF Pro.
Step 2: Log in to Azure from Nitro Pro as Azure Administrator
This step is required to add Nitro PDF Pro to the Azure tenancy so Azure Administrator can grant Admin consent for this application.- Restart Nitro PDF Pro.
- Wait while SSO dialog appears and log in as an Azure Administrator.
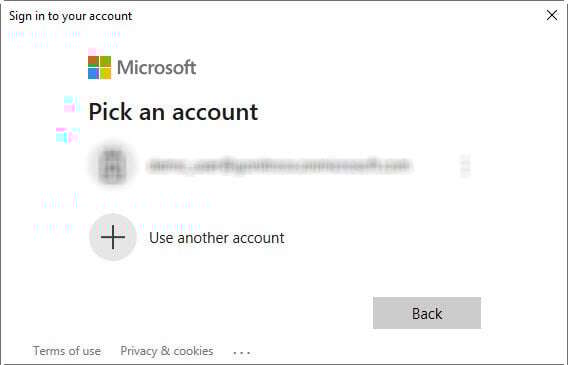
NOTE: If the current Windows user account does not have associated email, Nitro Pro first will prompt to enter an email before showing SSO dialog. - After a successful login, Nitro PDF Pro prompts to accept User Consent. Please, accept user consent:
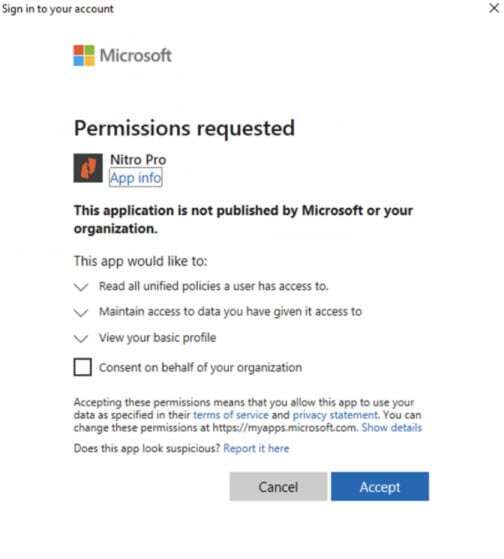
- At this point, Nitro PDF Pro is successfully logged into Azure
Step 3: Grant Nitro Pro Admin consent
- Login to portal.azure.com as Azure Administrator
- Go to Manage Azure Active Directory
- Select “Enterprise applications” on a left side panel
- Find “Nitro Pro” in the applications list and click on it
- IMPORTANT: On a left side panel, click “Properties”
- Ensure that Application ID is a98220f5-06d3-4bc5-9520-c7454eb24460
- Ensure that “Enabled for users to sing-in?” is Yes
- On a left side panel, click on “Permissions”
- Click “Grant Admin consent for <your tenant name>”. Azure will ask you to log in one more time as Azure Administrator. When login is successful, this consent dialog will appear:
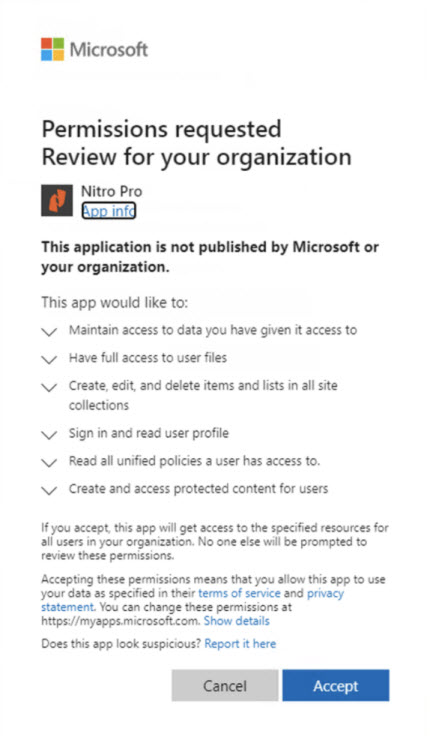
- Click Accept and the Admin consent for Nitro Pro will be added
Explaining Nitro Pro permission request
Azure Rights Management Service :
| Permissions | Type | Description | Needed for feature | Notes |
| user_impersonation | Delegated | Create and access protected content for user | - Azure Information Protection | Requested by MIP SDK when reading policy and labels. |
| Content.DelegatedWriter | Application | Create protected content on behalf of a user | - Azure Information Protection | Requested by MIP SDK to protect a document |
Microsoft Information Protection Sync Services :
| Permissions | Type | Description | Needed for feature | Notes |
| UnifiedPolicy.User.Read | Delegated | Read all unified policies a user has access to | - Azure Information Protection | Requested by MIP SDK when reading policy and labels. |
Microsoft Graph :
| Permissions | Type | Description | Needed for feature | Notes |
| User.Read | Delegated | Sign in and read user profile | - SharePoint Online - OneDrive - Azure Information Protection |
Allows sign in, called "generally required" in MS docs. |
| Files.ReadWrite | Delegated | Have full access to user files | - OneDrive - SharePoint Online |
|
| Files.ReadWrite.All | Delegated | Have full access to all files user can access | - OneDrive - SharePoint Online |
|
|
Sites.Manage.All |
Delegated |
Create, edit, and delete items and list in site collections |
- SharePoint Online |
Needed to upload files to SharePoint. |
|
Offline_access |
Delegated |
Maintain access to data you have given it access to |
- OneDrive |
Give access to refresh tokens, called "generally required" in MS docs. |