Files / Documents View
Navigate to documents just as you would in Apple's Files app. (See Opening Folders & Documents).
Page View
Once you open a document from the Files / Document view, you will enter Page view. Nitro PDF Pro provides three main modes: Reading, Editing, and Fullscreen.
Switch between Reading and Editing modes by tapping on the Reading or Editing icon located in the middle of the Toolbar. By default, PDF Pro will land in Reading mode.
Reading Mode
This is the default mode upon launching a document. Reading mode hides annotation and editing tools to allow users to focus on the reading experience. Basic Toolbar controls including Searching, Settings (scrolling options), and Sharing are still available in this mode.
Editing Mode
Editing mode reveals the Editing bar which provides annotation and editing tools. All Toolbar controls are available in this mode.
Fullscreen Mode
Single tap anywhere on the page to enter full screen mode and make the Toolbar disappear. Tap again to exit full screen mode, and the Toolbar will reappear.
Scrolling
Nitro PDF Pro provides multiple different scrolling and page view options: Horizontal, Vertical, Paginated, and Continuous.
Horizontal scrolling
Page horizontally through your document using a one fingered swipe, left or right. Use gestures to zoom in and out by pinching two fingers open and closed. When zoomed in, drag the page around with a finger to pan. Select scrolling preferences in Tools > Settings.
Vertical scrolling
Page vertically through your document using a one fingered swipe, up or down. Use gestures to zoom in and out by pinching two fingers, open and closed. When zoomed in, drag the page around with a finger to pan. Select scrolling preferences in Tools > Settings.
Paginated view / scrolling
Scroll through a document page by page with obvious page breaks. Page—horizontally or vertically—through your document using a one fingered swipe, left or right. Use gestures to zoom in and out by pinching two fingers open and closed. When zoomed in, drag the page around with a finger to pan. Select scrolling preferences in Tools > Settings > Scrolling Kind. Scrolling Kind respects preferences specified in Document Scrolling.
Continuous view / scrolling
Scroll quickly and smoothly through multiple pages of a document without obvious page breaks. Page—horizontally or vertically—through your document using a one fingered swipe, left or right. Use gestures to zoom in and out by pinching two fingers open and closed. When zoomed in, drag the page around with a finger to pan. Select scrolling preferences in Tools > Settings > Scrolling Kind. Scrolling Kind respects preferences specified in Document Scrolling.
Searching
Search Contents of a PDF by Keyword
Search the entire document for a word or phrase. View all matching results by page. Tap on a result to navigate to a page with the word or phrase.
- In the Pages view, tap Find in the Toolbar to open the search dialog.
- Enter the search term(s) in the search field. A list of pages containing the result(s) will appear. Scroll to see all matching results.
- Navigate to a result by tapping on the match.
To abort and start a new search, tap “X” in the search field.
Search for a Specific Folder or Document
Search for a specific folder or document in Nitro PDF Pro by using the search field found in Files view.
- In Files / Document view, tap on the Search field.
- Enter the search term(s) in the search field. A list of documents containing the result(s) will appear. Scroll to see all matching results.
- Navigate to a result by tapping on the match.
To abort and start a new search, tap “X” in the search field.
Multiple Windows
Nitro PDF Pro supports multiple windows. View two documents at once or use Nitro PDF Pro and another app simultaneously. To use work with multiple apps or windows simultaneously, split the screen into resizable views. See Apple Support to learn more about multitasking on your iPad.
- Enable/ Disable: To turn Multitasking features on or off from your device, choose Settings > General > Multitasking & Dock.
- How to Use: To open a second document in Nitro PDF Pro, drag Nitro PDF Pro out of the Dock to make a Slide Over or drag it to the right or left edge of the screen to make a Split View.
Easily access multiple apps or windows simultaneously, by splitting the screen into resizable views from Nitro PDF Pro.
- From either the Documents or Page view,
- Tap (three dots at the top of the app, above the Toolbar).
Choose any of the following options:
* Full Screen
* Split View
* Slide Over
* Close X
Modifying Documents
Document-level Edits
General document editing actions are accessible from the Toolbar. Long-press on the down arrowhead ⌄ to the right of the Document name / title to reveal the document size and additional editing options:
Rename: Edit the name of the document from Page view. You can also edit the name of the document in Files / Document view by long-pressing on the document to review more options.
Manage Pages (Thumbnail View): Organize pages in your document e.g. add, reorder, rotate, duplicate, delete. (See Manage Pages).
Document Info: View document metadata such as Title, Author, Subject, Keywords, Creator, Producer, and date of Creation. (See Document Information).
Page Numbering: Add and format page numbers. (See Page Numbering).
Encryption: Add a document password to protect your document. Choose your preferred encryption level. (See Document Encryption & Security).
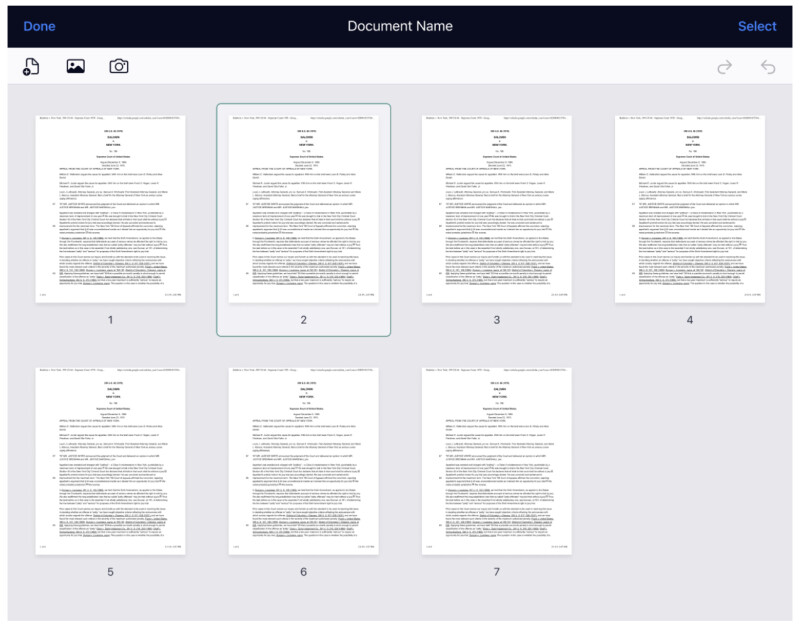
Manage Pages (Thumbnail View)
Manage Pages (thumbnail view) allows you to see and navigate through thumbnail-sized pages of a multi-page document on your device. From this view, you can add, delete, rotate, and re-order pages.
To enter Manage Pages view:
- From the Pages view, tap the arrow to the right of the document title in the Toolbar for more options.
- Select Manage Pages to enter the Thumbnail view.
Navigate to a specific page by tapping on it. Or, to manipulate multiple pages, tap “Select” in the Toolbar and select the pages you want to edit. Thumbnail view provides the following editing options:
Select: Select multiple pages to manipulate/ edit. (See Selecting Pages).
Done: Complete edits and return to Thumbnail view to navigate to a document page by selecting Done.
Add Page: Add a new page, either blank, lined, graph paper, or from a photo. Duplicate the selected page(s). Or create a new document from the selected page(s). (See Adding and Deleting Pages).
Add Photo/ Image: Add an image from your photo library to your document.
Take a Photo: Insert new photos to add to your document.
Undo: Undo the previous edit.
Rotate Page(s) Left: Rotate the selected page(s) either 180° or 90° left. (See Rotating Pages).
Rotate Page(s) Right: Rotate the selected page(s) either 180° or 90° right. (See Rotating Pages).
Delete Page(s): Delete the selected page(s). (See Adding and Deleting Pages).
Reorder Pages: Tap on the pages to select the pages you want to reorder. Drag and drop the selected pages into a new position in the document. (See Reordering Pages).
Duplicate [#] Pages: Duplicate selected pages within the document. Duplicated pages are added to the current document.
Create Document from Pages (Extract): Create a new document from the selected pages. (See Extracting Pages).
Selecting Pages
To select pages in a document:
- From the Pages view, tap the arrow to the right of the document’s title in the Toolbar for more tools.
- Select Manage Pages to enter the document in thumbnail view.
- Tap “Select” in the Toolbar.
- Tap to choose the pages you want to edit.
Selected pages can be reordered, rotated, deleted, duplicated, or extracted to create a new document.
There are a couple of ways to exit Manage Pages:
- From the Manage Pages view, select Done in the Toolbar.
- Tap to select any page in the Thumbnail view to return to Page view.
Adding & Deleting Pages
Add Page
Add a new blank page or add a blank page to your current document.
To add a new blank page to your current document:
- From the Pages view, tap the arrow to the right of the document’s title in the Toolbar for more options.
- Select Manage Pages to enter the thumbnail view.
- Tap the Add Page tool . You will be presented with an option to add a page from Stationery.
- Tap to select a type of new page: blank, lined or graph paper, etc.
- Your new page will be added to the end of the document.
To exit the Manage Pages view, select Done in the Toolbar, or tap to select any page in the thumbnail view to return to Page view.
Add Photo/ Image
To add an image from your photo library to your current document:
- From the Pages view, tap the arrow to the right of the document’s title in the Toolbar for more options.
- Select Manage Pages to enter the thumbnail view.
- Tap the Add Photo tool . You will be presented with an option to add a Photo (from the device’s photo library).
- Tap select the photo you want to add (or tap “Cancel” to abort).
- Your photo will be added to the end of the document.
To exit the Manage Pages view, select Done in the Toolbar, or tap to select any page in the thumbnail view to return to Page view.
Add a Photo
To add an image from your photo library to your current document:
- From the Pages view, tap the arrow to the right of the document’s title in the Toolbar for more options.
- Select Manage Pages to enter the thumbnail view.
- Tap the Camera tool . Your device’s camera will launch.
- Take a picture (or tap “Cancel” to abort).
- Your photo will be added to the end of the document.
To exit the Manage Pages view, select Done in the Toolbar, or tap to select any page in the thumbnail view to return to Page view.
Delete Page(s)
To delete pages in your current document:
- From the Pages view, tap the arrow to the right of the document’s title in the Toolbar for more options.
- Select Manage Pages to enter the thumbnail view.
- Tap “Select” in the Toolbar and select the pages you want to delete.
- Tap the Trash to delete the selected pages (or tap ”Cancel” to abort).
To exit the Manage Pages view, select Done in the Toolbar, or tap to select any page in the thumbnail view to return to Page view.
Rotating Pages
Rotate Page(s) Left
To rotate pages counterclockwise (left) in a document:
- From the Pages view, tap the arrow to the right of the document’s title in the Toolbar for more options.
- Select Manage Pages to enter the thumbnail view.
- Tap “Select” in the Toolbar and tap to select the pages you want to rotate.
- Tap the Rotate left tool to rotate your selected pages left either 180° or 90° (or tap Cancel” to abort).
To exit the Manage Pages view, select Done in the Toolbar, or tap to select any page in the thumbnail view to return to Page view.
Rotate Page(s) Right
To rotate pages counterclockwise (right) in a document:
- From the Pages view, tap the arrow to the right of the document’s title in the Toolbar for more options.
- Select Manage Pages to enter the thumbnail view.
- Tap “Select” in the Toolbar and tap to select the pages you want to rotate.
- Tap the Rotate right tool to rotate your selected pages right either 180° or 90° (or tap Cancel” to abort).
To exit the Manage Pages view, select Done in the Toolbar, or tap to select any page in the thumbnail view to return to Page view.
Reordering Pages
To reorder pages in a document:
- From the Pages view, tap the arrow to the right of the document’s title in the Toolbar for more options.
- Select Manage Pages to enter the thumbnail view.
- Tap “Select” in the Toolbar.
- Tap to choose the pages you want to reorder.
- Drag and drop them into a new position in your document.
To exit the Manage Pages view, select Done in the Toolbar, or tap to select any page in the thumbnail view to return to Page view.
Duplicating Pages
To duplicate pages in a document:
- From the Pages view, tap the arrow to the right of the document’s title in the Toolbar for more options.
- Select Manage Pages to enter the thumbnail view.
- Tap “Select” in the Toolbar.
- Tap to choose the pages you want to duplicate.
- Tap More to reveal more options.
- Choose “Duplicate [#] pages” (or tap “Cancel” to abort).
Duplicated from the selected page(s) will be added to the current document.
To exit the Manage Pages view, select Done in the Toolbar, or tap to select any page in the thumbnail view to return to Page view.
Extracting Pages
To “Create document from pages” (extract pages) from a document:
- From the Pages view, tap the arrow to the right of the document’s title in the Toolbar for more options.
- Select Manage Pages to enter the Thumbnail view.
- Tap “Select” in the Toolbar.
- Tap to choose the page(s) you want to extract and create a new document.
- Tap “More” to reveal more options.
- Choose “Create document from pages” (or tap “Cancel” to abort).
A new document will be created from the selected pages.
To exit the Manage Pages view, select Done in the Toolbar, or tap to select any page in the thumbnail view to return to Page view.
Combining Documents
To merge or combine multiple PDFs into a single document:
- From Files / Document view:
- iPad: tap “Select” to select the documents you want to edit.
- iPhone: tap “More” to reveal more options and tap ”Select.”
- Tap to select the documents you want to Join (aka combine).
- Choose “Join” in the Toolbar.
A new document will be created from the selected documents.
Document Information
View your document’s properties. Document information typically includes the following:
- Title
- Author
- Subject
- Keywords
- Creator
- Producer
- Created
- Modified
Annotation Author
The Annotation Author’s name appears at the bottom of Comments and certain Stamps in a PDF. This name appears with select annotations when the document is shared. By default, no Annotation Author name is set.
To set or remove the Annotation Author name:
- In Page view, from the Toolbar, tap More > Advanced > Annotation Author.
- In the popup dialog, type the name you want to appear at the bottom of your Comments and Stamps (or remove a name).
- Tap “OK” to finish (or “Cancel” to abort).
Reducing Document File Size
To reduce a document’s file size:
- From Files / Document view, find and tap “Select.”
- Tap to select a document to optimize (reduce document file size)
- On the iPad or iPhone, tap “More...” to reveal more options.
- Choose Optimize File Size.
Document Encryption & Security
Passwords & Encryption
Add a password to a document. This encrypts the document so that it can only be viewed or opened by a user with the password.
Encryption
To set a document password:
- From the Pages view, tap the arrow to the right of the document’s title in the Toolbar for more options.
- Choose Encryption .
- From the pop-up, select a level of encryption. Details on the levels of encryption available are listed below.
- Type a password and verify.
- Tap “Done” to secure your document (or tap “Cancel” to abort).
Encryption Levels
Select an encryption level while setting the document password. While stronger encryptions are harder to break, fewer PDF viewers and editors are capable of supporting them. A user with an older PDF viewing software may not be able to view your document, even with the password. Nitro PDF Pro generally provides three levels of encryption.
- Weak: RC4–40 level encryption. A document secured with this level of encryption can be viewed by most PDF viewers.
- Strong: AES–128 level encryption. A more secure encryption that can be deciphered by fewer PDF viewers.
- Strongest, Least Compatible: AES–256 level encryption. One of the latest and most secure encryptions. It can only be viewed by PDF viewers which have been updated to support it.