
Add tags and their properties manually to create the document structure.
To create the document structure manually
1. Open your PDF document with Nitro PDF Pro
2. Select Accessibility > Create Tags
3. Select where you want to add your tag
4. Click Tag

Note: The best practice for organizing the structure of a document is to have only one root tag, which is typically the Document tag.
When this mode is enabled, the Create Tag tab opens and the Ribbon shows the options for tag creation. In this mode, you can select content in your PDF document and assign tags to it.
5. Once you have created the tags, click Finish
6. Click Save on the top bar or press Ctrl+S on your keyboard to save your changes
Note:
With the tag creation mode enabled, you can easily identify what content to tag:
- The tagged content is highlighted with a grey color.
- If the content has a tag and you select this tag under Tags, the content is highlighted with a grey color and has an orange outline.
- The current selection is highlighted with an orange color and has an orange outline.
- The content without highlighting or outlining is not tagged yet.
- To change the place of a tag in the Tags tree, select it and drag it to the right place.
To select the content that you want to associate with a tag, do one of the following:
- Word
- Line of text
- One or more paragraphs
- Place your cursor before the text that you want to select.
- Press and hold the left button of your mouse while dragging your cursor to select the text you want.
- Select content.
- Press and hold Shift on your keyboard and select more content.
- To deselect all content, click an empty area in the document.
- To partially deselect the content, press and hold the Ctrl button on your keyboard and select the content that you want to exclude from the current selection.
- With the Create Tag tab selected, on the Ribbon select a value such as a paragraph or figure, from the Tag Type list, and click Tag
- Right-click the selected content and select an option from the menu.
The new tag is added to the Tags tree.
To review tag properties
Under Tags right-click the tag and select Show Properties
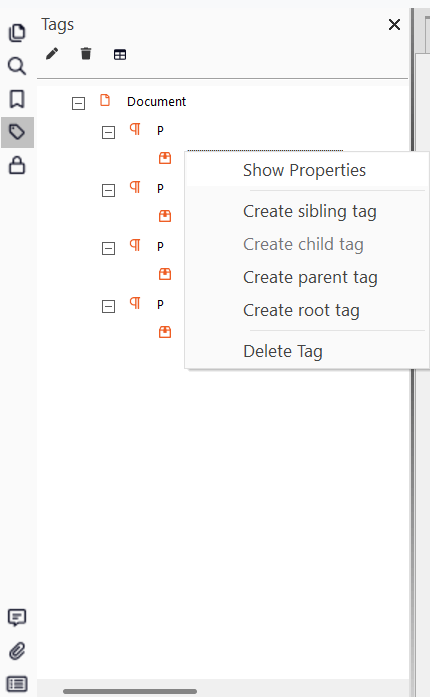
In the Tag Properties panel, review and complete the following fields, as needed:
The ID must be unique for each tag in a document.
To view the properties of the content (leaf) node under one of your tags
Under Tags right-click the tag and select Show Properties. The Content Properties are added under Tag Properties.
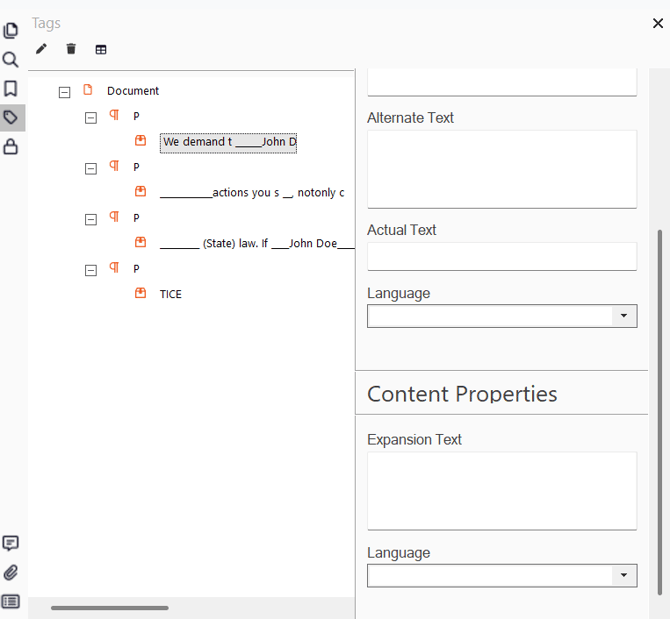
Review and complete the following fields, as needed: