Welcome to Nitro!
We're thrilled to have you onboard and excited to help you unlock the value of Nitro.
We know a smooth setup is key, so we've compiled all the essential onboarding materials you'll need for a successful implementation right here on this page. Our 24/7/365 support team is also just a click away to answer any questions you might have along the way. We're here to help you succeed.
Let's get started!

Nitro PDF Pro is available on Windows, Mac, and iOS and the installers and installation guides can be found below.
PDF Pro for Windows
PDF Pro for Mac
PDF Pro for iOS
Sign
Nitro Sign
Both Nitro PDF Pro and Nitro Sign products require activation via the Nitro Admin Portal, and each user must have a Nitro Account. Details on how to set up user accounts can be found under Account Setup.
Account setup
Setting up your Nitro Team Account
Note: Account setup and license management are consistent for PDF and Sign solutions.
The Nitro Admin Portal is a centralized system for managing named-user licenses for Nitro PDF Pro for Windows/Mac/iOS and Nitro Sign. The Nitro Admin Portal can be accessed by your designated Nitro Admin.
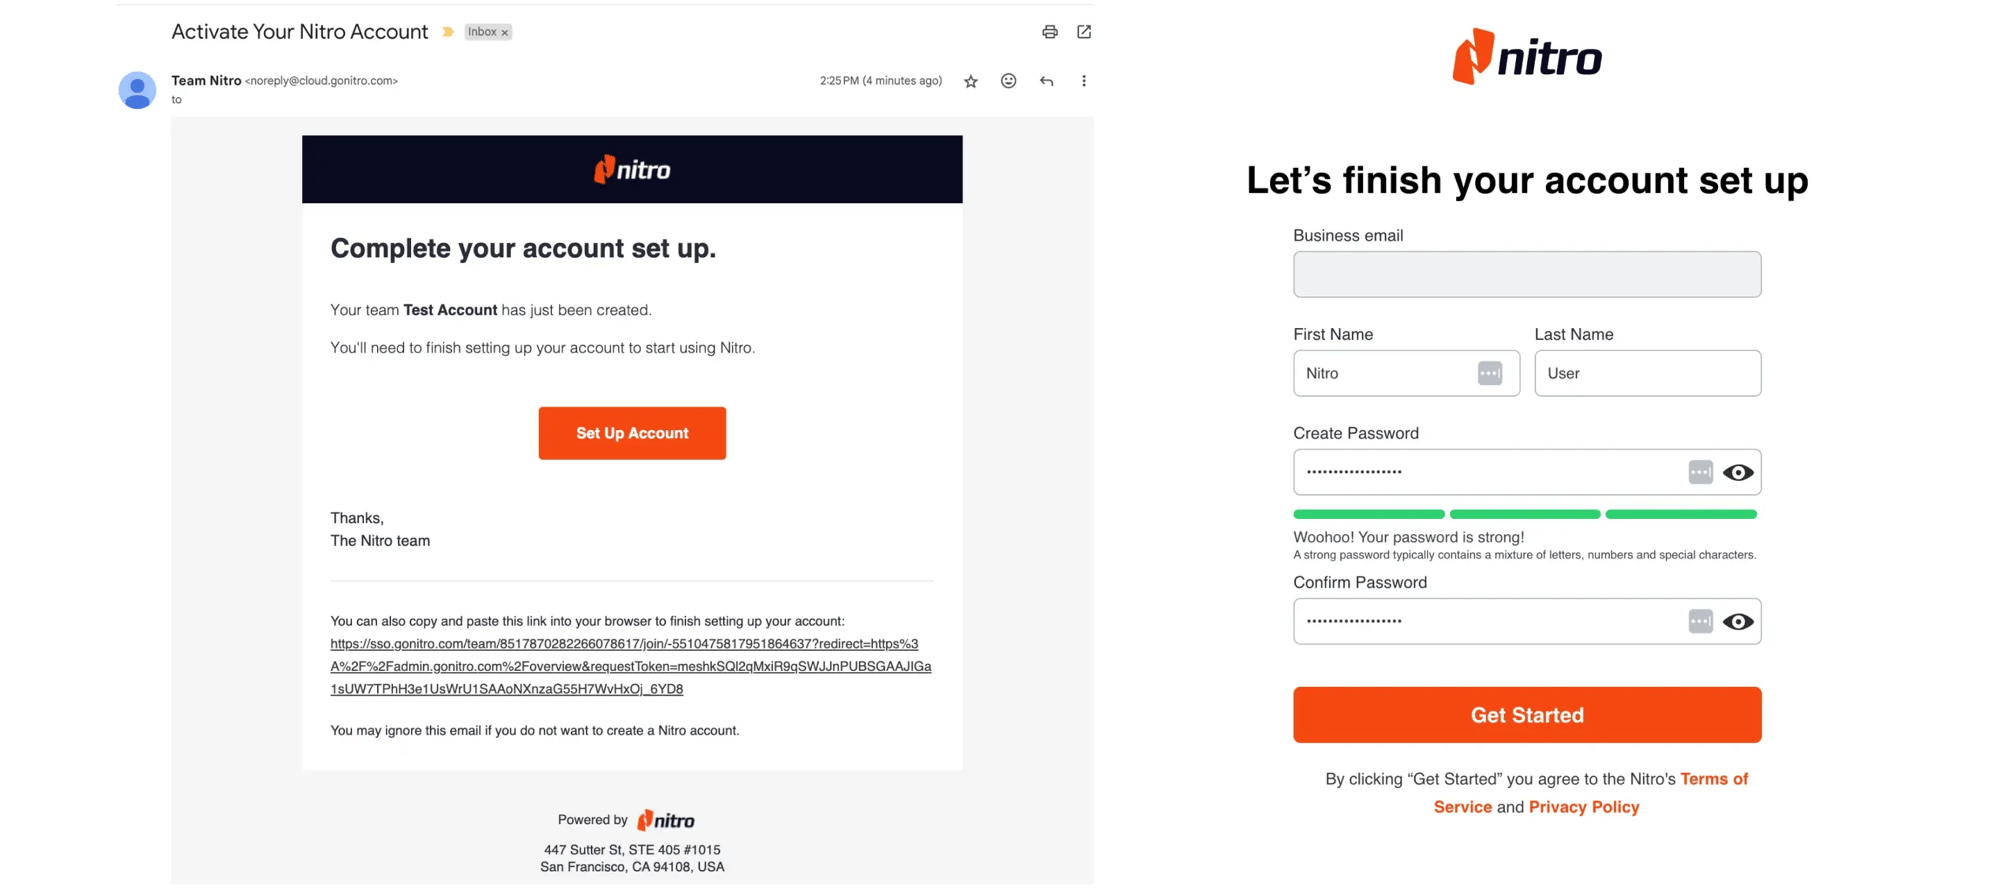
- Your designated Nitro Admin will receive an email with the subject “Activate your Nitro Account.”
- Upon receipt of the email, the Nitro Admin should click the Set Up Account link in the email to verify their name and email, then create a password.
- Click Get Started to complete the Team Account creation process.

Managing your Nitro Team Account
After creating the Team Account, your Nitro Admin can invite additional users to join and activate their license. There are two options for inviting users to the Team Account: manually or via single sign-on (SSO).
Inviting users and assigning licenses
Inviting individual users:
1. Invite individual users (one at a time), or invite multiple users simultaneously by uploading a .CSV file.2. Your Nitro Admin should log in to the Nitro Admin Portal and select Users from the left-hand menu, then select Invite Users.

4. Optional: If you would like to assign Administrator privileges, select the appropriate Admin Roles.
- Global Admin: Ability to invite, suspend, and delete users from the Team Account.
- Document Admin: Ability to add Team documents and templates that can be accessed by all members of the Team Account.
5. All active Nitro licenses will be selected by default for the user. However, you can unselect any licenses that should not be assigned to the invited user. The available license options depend on your Nitro subscription type.
6. Click Send Invite, which triggers an invite to users to create their Nitro Account and activate their license by verifying their email address and creating a password.
7. Once the user activates their Nitro Account, they can access Nitro PDF Pro for Windows/Mac/iOS or Nitro Sign depending on which plans have been assigned to them.


Adding Users via SSO:
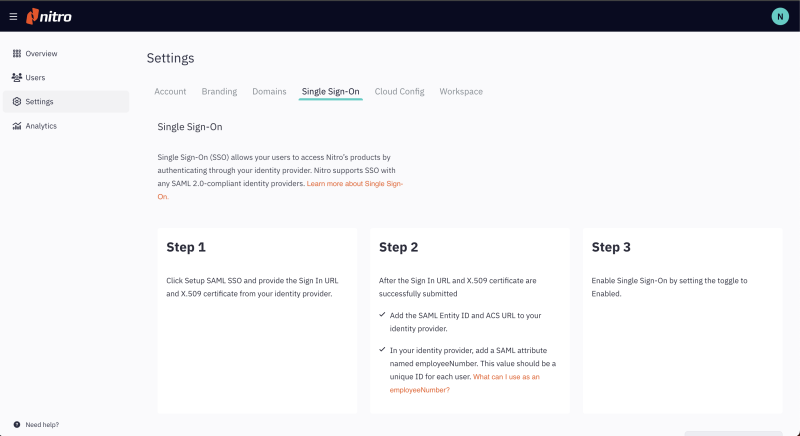
Single sign-on (SSO) is included with a Nitro PDF Plus subscription or is available as an add-on. SSO allows users to access Nitro products by authenticating through your Identity Provider (IdP). Nitro supports SSO with any SAML 2.0-compliant IDP.
Set up SAML SSO:
-
Login to the Nitro Admin Portal.
-
Select Settings in the left navigation pane, and navigate to the Single Sign-On tab.
-
Click the Setup SAML SSO button.
- For detailed instructions for setting up, enabling, and testing SSO, view the user guide.

For a video overview, please view our Quick Start Guide:
Useful links
Support center
You are in good hands! Access 24/7/365 support from Nitro’s world-class customer support team by submitting a support ticket. You can also access our online learning center at any time.

/Card-Page%20Previews-AI.png?width=1200&height=800&name=Card-Page%20Previews-AI.png)
