
Admin Guide: Install, Configure, Manage and Troubleshoot Nitro Sign for SharePoint
This article explains how to install, configure, manage and troubleshoot Nitro Sign for SharePoint as a Global Admin or SharePoint site owner, depending on the permissions delegated by the Global Admin.
You can install Nitro for SharePoint from the SharePoint App store. There are three ways to do this:
-
Microsoft Marketplace
-
Microsoft 365 admin center
-
Your Organization’s SharePoint Page
Method 1: To access the SharePoint App store from Microsoft Marketplace
- In the search bar, enter Nitro Sign for SharePoint
-
Click Get it now
-
You are redirected to the SharePoint app page
Method 2: To access the SharePoint App store from Microsoft 365 admin center
-
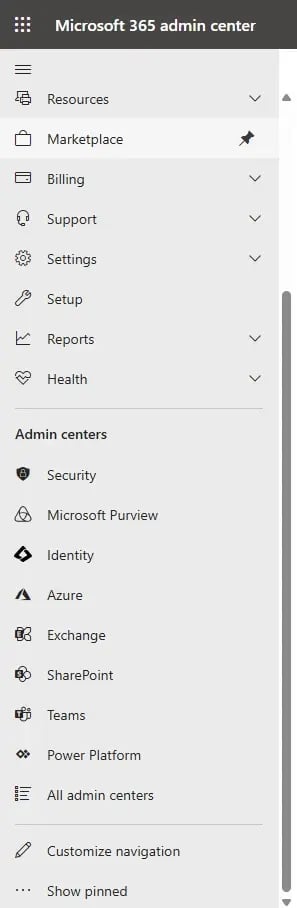
Go to the Microsoft 365 admin center
-
Select Sharepoint
-
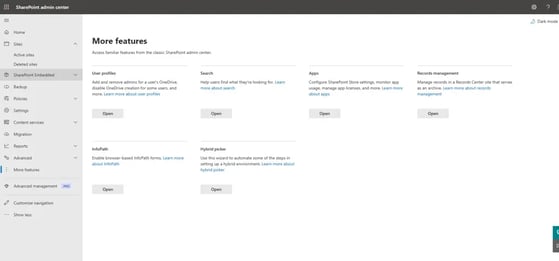
Select More features
-
Select Open under Apps
-
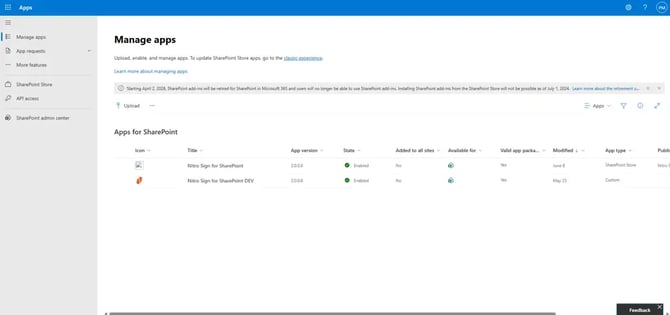
Click the SharePoint store button to go to the SharePoint app store
Method 3: To access the SharePoint App store from SharePoint
-
Go to your SharePoint homepage
-
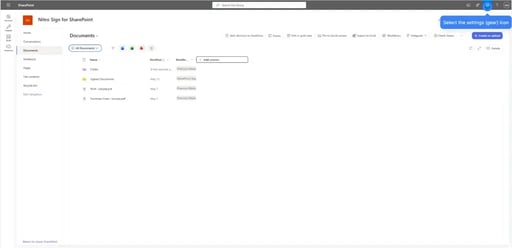
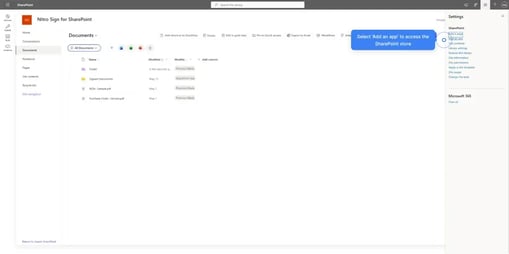
Click Settings (gear icon) in the top-right corner
-
Click Add an app
-
SharePoint app store opens
Continue installation from SharePoint App Store
-
Navigate to the SharePoint Store tab
-
In the search bar, enter Nitro for SharePoint
-
Select the app
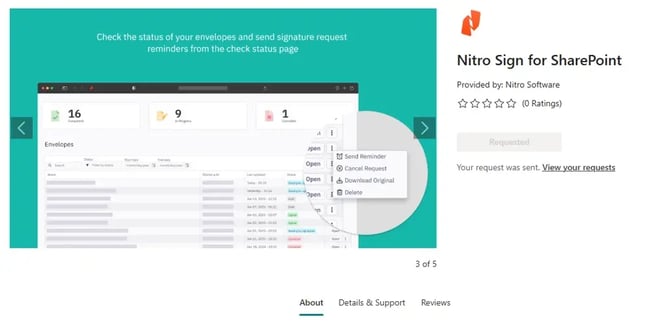
- Click Add to install the app
Note: If you do not have the required Admin permissions, you may need to click Request. Your administrator can then follow the steps outlined below.
Admin Note: Uninstall the previous SharePoint Add-in, ‘Nitro Sign for SharePoint Online’ .app package if still available in Site Contents within any tenant site to avoid confusion for end-users.
Enable API and User Permissions (Global Admin)
To grant API permissions
-
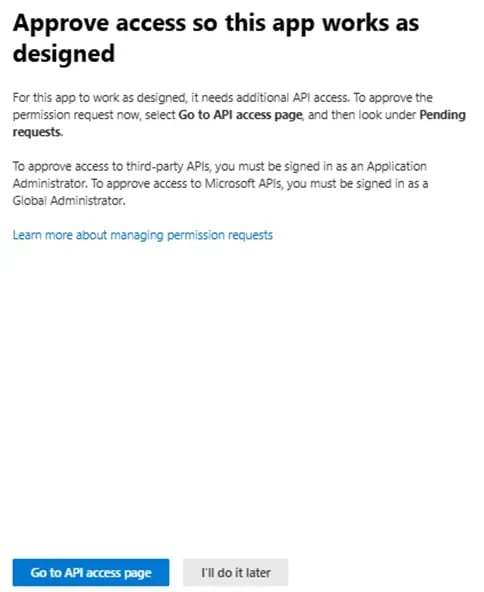
Enable App
-
Select Go to API access page
-
Under Pending requests, locate Nitro Sign for SharePoint Microsoft Graph API requests
-
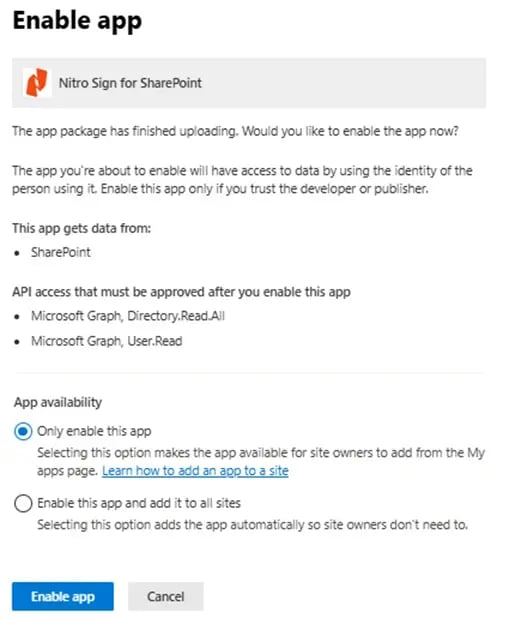
Choose one of the options:
-
Only enable this app
Site owners must add the app manually
-
Enable this app and add it to all sites
The app is automatically available to all users
To Verify Application in Site Contents
-
Navigate to SharePoint documents page
-
Open Site Contents
-
Confirm that Nitro Sign for SharePoint is listed
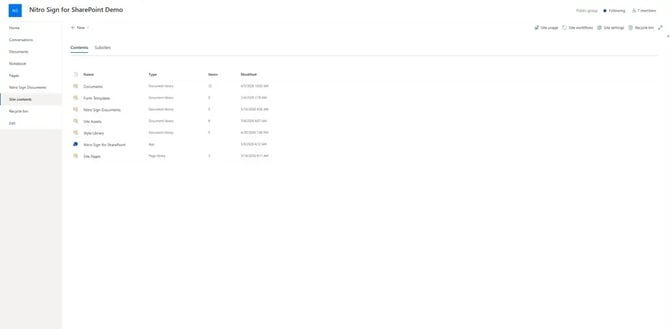
To add Nitro Sign for SharePoint per Site
Note: If the Global Admin selects Only enable this app, site owners must add the app manually
-
Go to your SharePoint homepage
-
Click the Settings (gear icon) in the top-right corner
-
Click Add an app
-
Go to the SharePoint Store tab
-
In the search bar, enter Nitro Sign for SharePoint
-
Select the app
-
Review the app information in the About and Details & Support sections
-
Click Add to install the app
Authorize Nitro Sign to begin using the app
-
Navigate to the Documents section of your SharePoint site
-
Confirm that Nitro Sign buttons are visible in the top ribbon
-
Select Authorize Nitro Sign
-
This will redirect you to the Microsoft admin consent flow
- Select Accept to continue
- This action grants access to site collections and allows Nitro Sign to identify users in your tenant
Note: Microsoft Graph API tokens are available for the SharePoint tenant. However, they cannot access any site until you run a PowerShell script.
-
Grant the permissions requested as part of this flow on the next screen to run the PowerShell script
-
Close all open tabs and windows. Nitro Sign will now have secure access to your SharePoint folder.
Steps to run the PowerShell script
- Download the PowerShell script:Grant-AppSitePermission
- Open PowerShell v7.2+
- Navigate to the directory where you saved the script
- Run command to execute the script for all SharePoint sites:
./Grant-AppSitePermission.ps1 -TenantId [your-sharepoint-tenant-id] -All
Or
- Run command to execute the script for specific SharePoint site
./Grant-AppSitePermission.ps1 -TenantId [your-sharepoint-tenant-id -SiteID [your-sharepoint-site-id]Admin Note: Granting these PowerShell permissions is necessary as users will not be able use the app otherwise
Troubleshooting
Installation Issues
|
Issue |
Cause |
Resolution |
|
App does not appear in App Catalog |
Upload incomplete |
Re-install the app or re-upload the .sppkg file |
|
App shows "Disabled" status |
Deployment conflict |
Remove the app, wait 5 minutes, redeploy |
|
Commands not visible in document libraries |
Not deployed tenant-wide |
Verify "Make this solution available to all sites" was selected |
|
API permissions not appearing |
Incorrect package version |
Verify correct `.sppkg` file from AppSource |
|
PowerShell not running permissions |
PowerShell version below v7 |
Download the latest PowerShell v7.2+ version |
|
Downloaded script not running |
Execution Policy is restricted |
Set execution policy to unrestricted for your user scope |
Permission Issues
|
Issue |
Cause |
Resolution |
|
Cannot approve API permissions |
Insufficient privileges |
Contact Global Administrator to grant permissions according to admin installation steps |
|
"Authorize Microsoft Access" not visible |
User is not a Global Administrator |
This command is only available to tenant administrators |
|
Permissions show denied status |
Previously rejected |
Remove app, clear permissions, reinstall |
Runtime Issues
|
Issue |
Cause |
Resolution |
|
"Unable to validate document" error |
Network connectivity |
Verify `partners.gonitro.com` is accessible |
|
"File size exceeds maximum" error |
File too large |
Reduce file size or contact support |
|
Commands visible but not responding |
Browser issue |
Clear cache, disable extensions, try InPrivate/Incognito mode |