
Get your SCIM credentials from Nitro
- Sign in to the Nitro Admin App
- Go to Settings
- Navigate to the SSO & Provisioning tab
- Go to the Provisioning via SCIM section
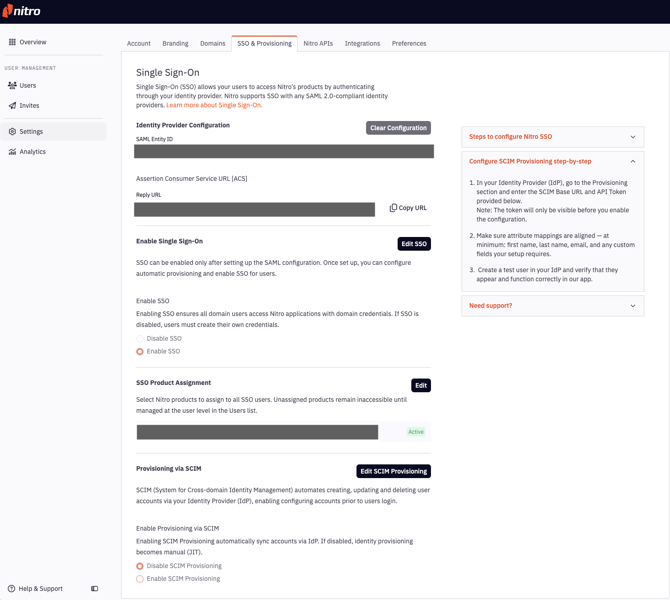
- Click the Edit SCIM Provisioning button
- Select Enable SCIM Provisioning
- Click Save
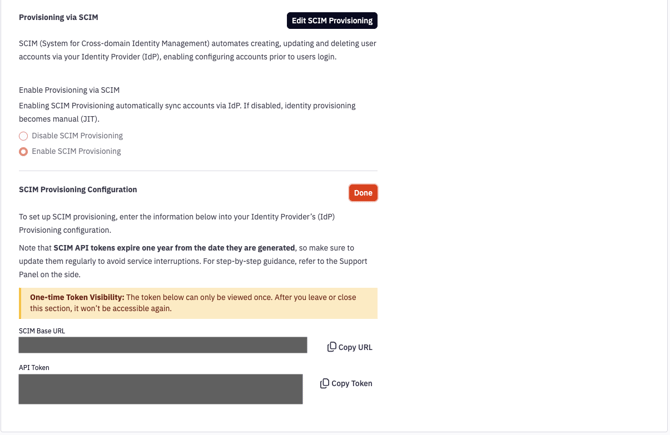
- Click Generate SCIM Token
- Copy and save the SCIM Base URL and the API Token
- Click Done
Notes:
- The token can only be viewed once. After you leave the SSO & Provisioning section, it won’t be accessible again.
- If you lose the token, it can be revoked and a new one can be generated.
- SCIM API tokens expire one year from the date they are generated, so make sure to update them regularly to avoid service interruptions.
To generate a new token:
- Click Edit SCIM Provisioning
- Then click Revoke Token
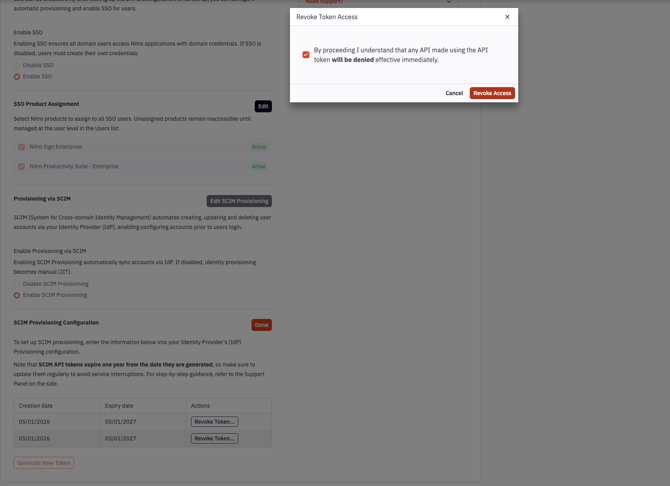
- You can then generate a new token by clicking Generate SCIM Token as in the steps above.
Configure SCIM in Okta Workforce for SAML Apps
- Open your Okta Workforce Identity SAML application
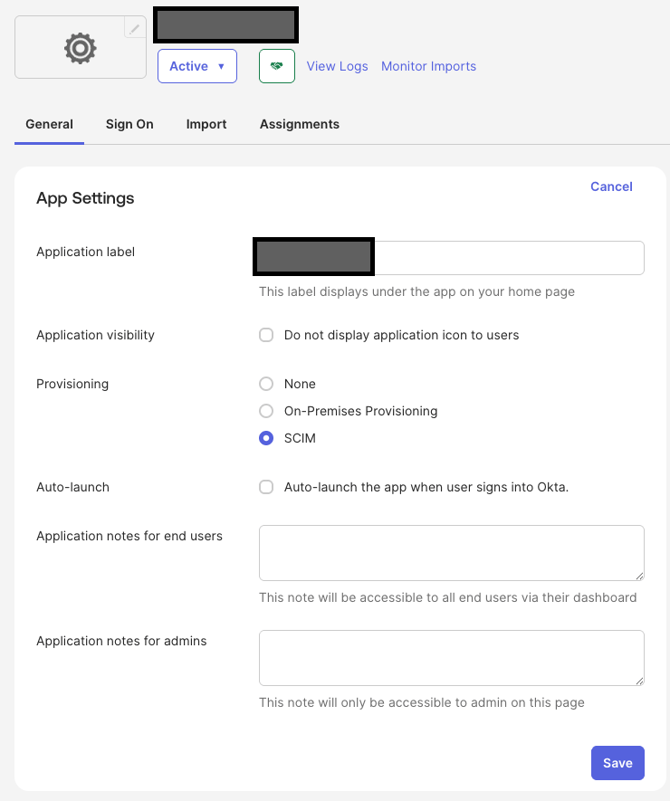
- Navigate to the General tab
- Click Edit in the upper-right corner of the App Settings section
- In the Provisioning section, select SCIM
- Click Save
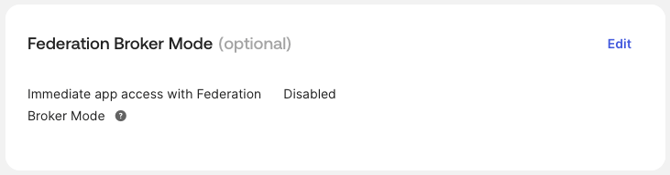
- Still on the General tab, scroll down to the Federated Broker Mode section, and confirm that Federation Broker Mode is disabled
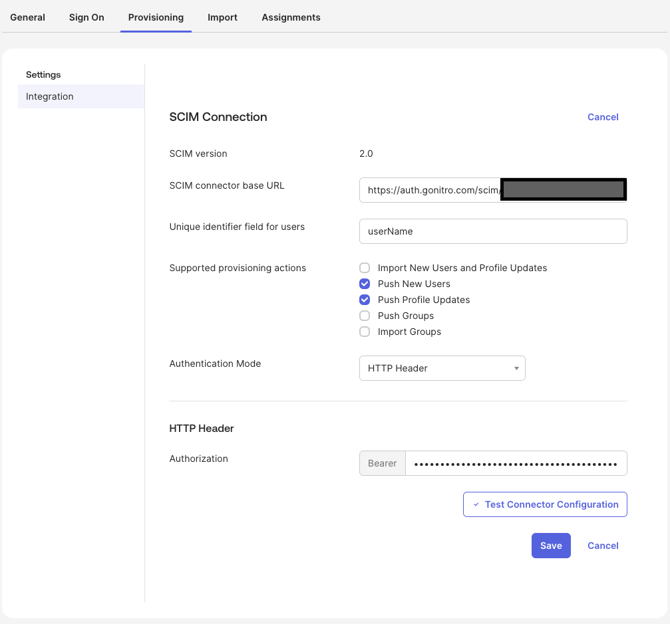
- Navigate to the Provisioning tab
- Go to the Integration tab
- Select Edit
- Paste the SCIM Endpoint URL value you copied earlier
- In the Unique identifier field for users, enter userName
- In Supported provisioning actions, select
Push New UsersandPush Profile Updates - Choose HTTP Header as the Authentication Mode
- Paste the SCIM token into the Authorization field
- Click Test Connection Configuration to verify the connection before saving
- Click Save
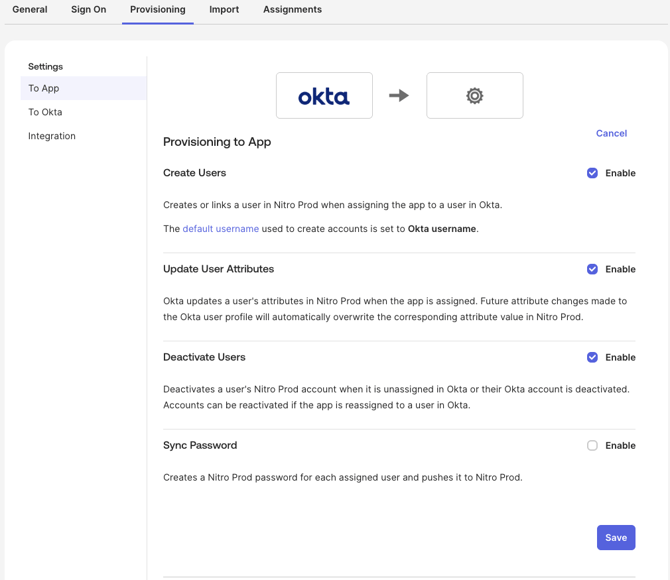
- Next, configure provisioning actions. Browse to Provisioning > Settings > To App and click Edit
- Click Enable for:
- Create Users
- Update User Attributes
- Deactivate Users
- Click Save
- Under the Attribute Mappings section, use the X button to delete the following rows. These default mappings conflict with Nitro's SCIM implementation and must be removed:
|
Attribute |
Value |
|---|---|
|
Primary email type |
|
|
Primary phone type |
|
|
Address type |
|
Testing
You can now test user provisioning in the Assignments tab, and verify update operations by editing user attributes in Directory > People.
Notes:
Provisioning existing users
If users already existed in Nitro before you set up SCIM, you will need to sync them. Assign them to the Nitro application in Okta and they will be provisioned immediately.
Automatic provisioning
Once SCIM is configured, provisioning is always active. Any user assigned to the Nitro application will be provisioned immediately.