Prerequisite: a SCIM-compatible SSO application in Entra
Before setting up SCIM provisioning, you must have a Microsoft Entra SSO Enterprise Application for Nitro that supports SCIM provisioning.
If you are setting up your Nitro SSO app for the first time
Follow our Set Up Single Sign-On (SSO) with Azure AD/Entra to create and configure the application before continuing with the SCIM setup.
If you have an existing Nitro SSO app
Please confirm that it supports SCIM provisioning:
-
Sign in to the Microsoft Entra Admin Centre
-
Go to Entra ID > Enterprise Applications and select your Nitro application
-
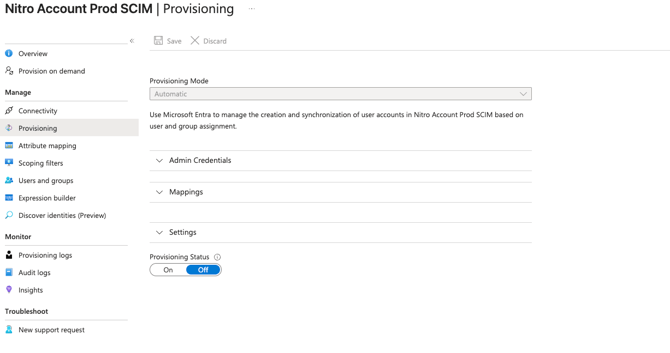
Navigate to Manage > Provisioning
If provisioning loads normally, your application supports SCIM, your SSO App is all set; however if you see the following error:
"Out of the box automatic provisioning to YOUR NITRO APPLICATION NAME is not supported today. Ensure that YOUR NITRO APPLICATION NAME supports the SCIM standard for provisioning..."
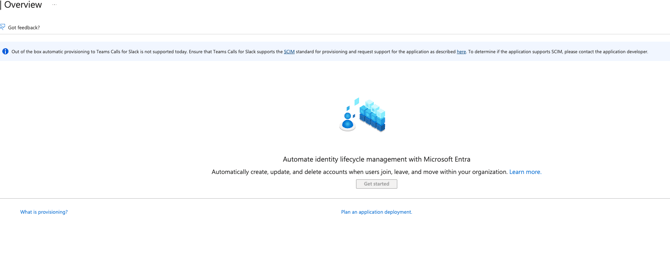
You need to:
-
Create a new application in Entra first. Follow our Set Up Single Sign-On (SSO) with Azure AD/Entra to create the new Enterprise Application, configure SAML, and assign the same users and groups that had access to the old application.
-
Then update the SSO configuration in the Nitro Admin Portal. This is the only step that briefly interrupts sign-in for your organization — typically just a few minutes.
-
Once the SCIM-compatible SSO application is set up and the SSO connection is confirmed working, continue below to set up SCIM provisioning.
Step 1 - Get your SCIM credentials from Nitro
-
Sign in to the Nitro Admin App
-
Go to Settings
-
Navigate to the SSO & Provisioning tab
-
Go to the Provisioning via SCIM section
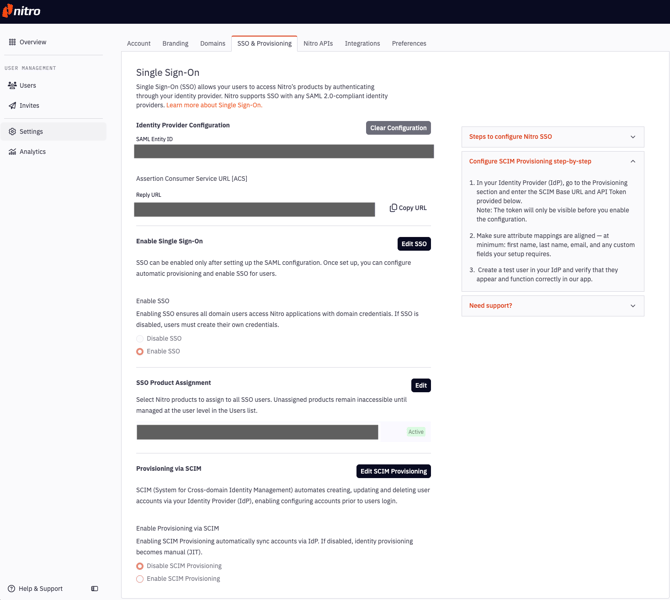
- Click the Edit SCIM Provisioning button
- Select Enable SCIM Provisioning
- Click Save
- Click Generate SCIM Token
- Copy and save the SCIM Base URL and the API Token
- Click Done
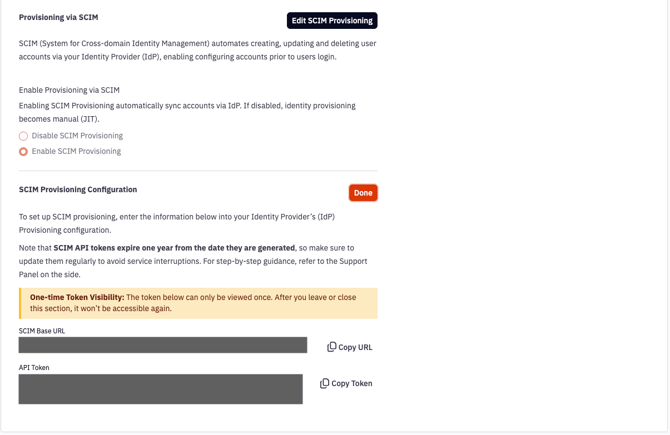
Note:
- The token can only be viewed once. After you leave the SSO & Provisioning section, it won't be accessible again.
- If you lose the token, it can be revoked and a new one can be generated.
- SCIM API tokens expire one year from the date they are generated, so make sure to update them regularly to avoid service interruptions.
To generate a new token:
- Click the Edit SCIM Provisioning
- Then click Revoke Token
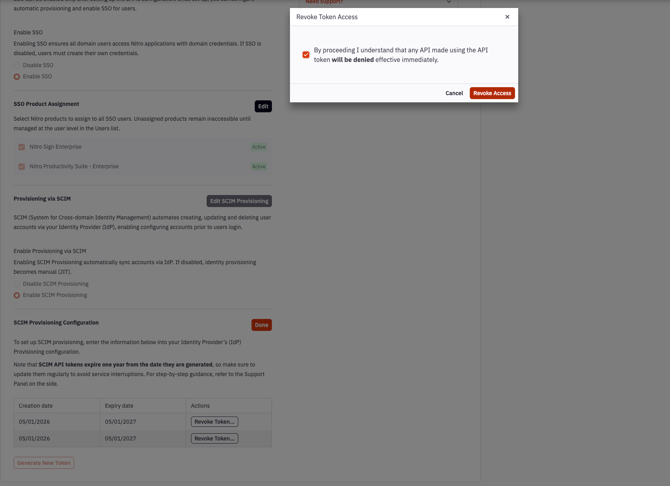
- Then you can generate a new token by clicking Generate SCIM Token as in the steps above.
Step 2 - Configuring SCIM in Microsoft Entra
- In the Microsoft Entra admin centre, navigate to Entra ID > Enterprise Applications
- Select your application
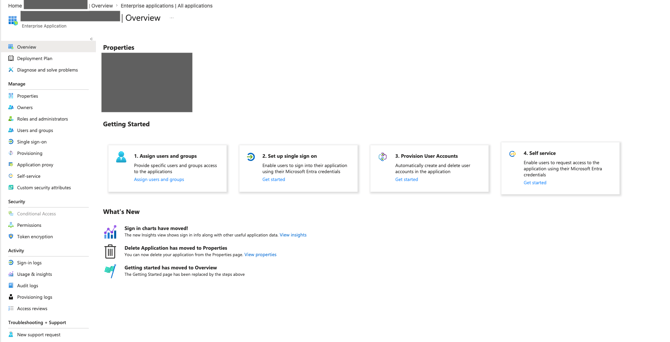
3. Continue to Manage > Properties
4. Set Assignment Required to Yes
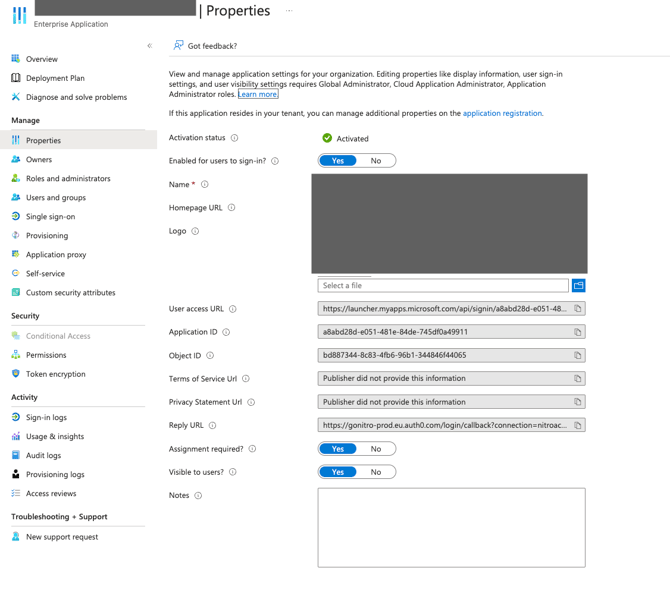
5. Navigate to Manage > Provisioning
6. Select Get started
7. Click Connect your application
8. In the Admin Credentials section, configure the following parameters:
Do not skip this step. Without it, deactivate user won't work correctly — A user removed in Entra could still show as active in Nitro.
Set Tenant URL to the SCIM endpoint URL you saved earlier, with ?aadOptscim062020 added to the end — e.g. https://auth.gonitro.com/scim/v2/connections/connection_id/?aadOptscim062020
-
Set the Secret Token to the token value you saved in the previous step
-
You can click the Test connection button to test the configuration.
-
Click Create
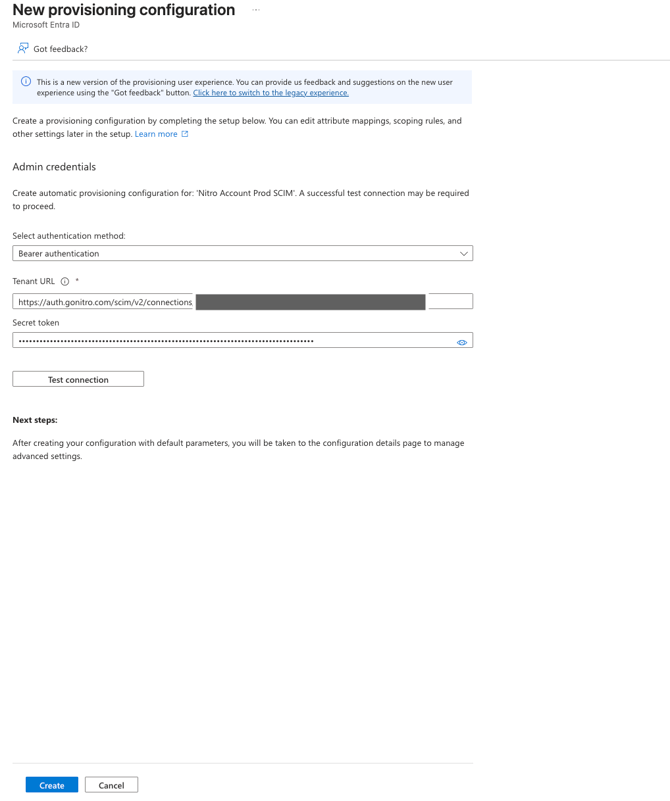
Step 3 - Updating Attribute Mappings
1. Navigate to the Attribute Mapping section
2. Select the User section
.png?width=670&height=239&name=Screenshot%202026-05-28%20at%2016.08.15%20(1).png)
3. Click the Provision Microsoft Entra ID Users, you should see the default mappings:
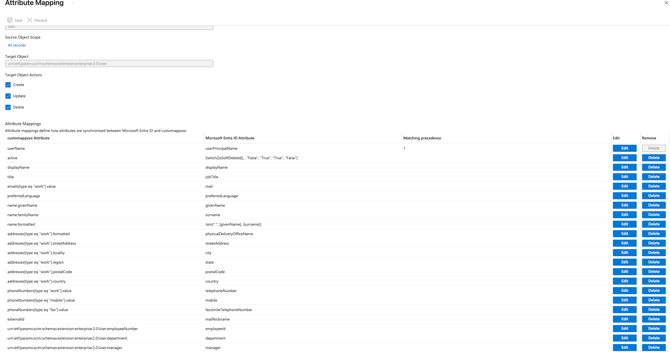
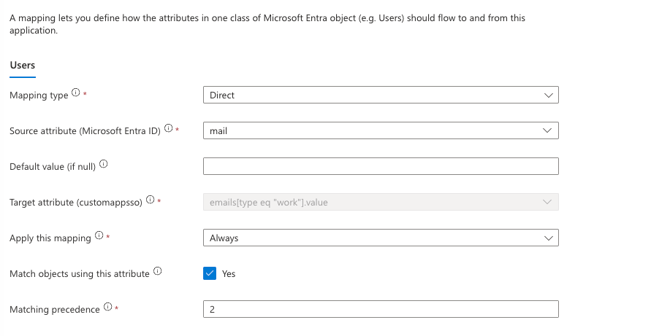
4. In the attribute mapping table row containing emails[type eq "work"].value and mail, select Edit to go to the Edit Attribute screen and configure the following parameters:
Do not skip this step. If you have existing Nitro users, this is the only setting that tells Entra to match them by email instead of creating duplicate accounts.
- Set Match objects using this attribute to Yes
- Set Matching precedence to 2
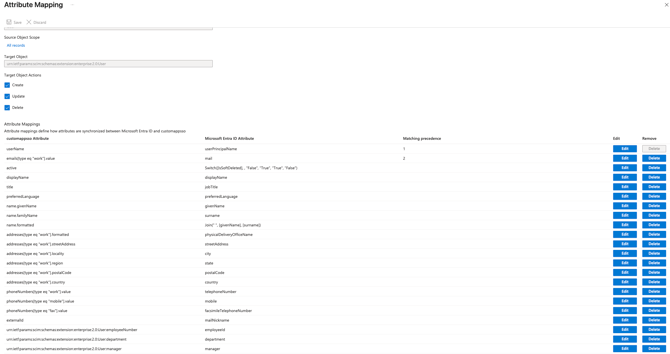
5. Save the changes, refresh the page, the attribute mapping should be same as below:
Testing
To verify everything is working, go to Manage > Provisioning > Provision on Demand and test with a user in MS Entra.
Monitoring
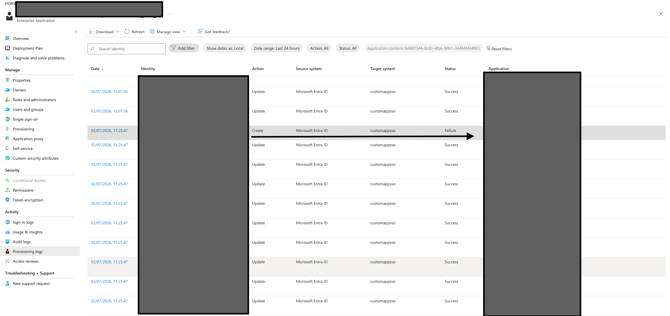
We highly recommend you to monitor the Provisioning Logs to make sure users are provisioned/updated successfully.
Click the Activity → Provisioning logs:
Notes
If users existed in the system before you set up SCIM, sync those users.
To sync all assigned users, set Provisioning Status to On. The system will automatically provision all assigned users approximately every 40 minutes.
To sync a specific user, use Provision on Demand. This option provisions users manually.