Georgia was on a week-long getaway in Death Valley National Park, California’s below-sea-level, heat-infused natural wonder, when she got an email. She sits on her hometown’s Historical Society, and a fellow board member needed her to sign a document in order to complete paperwork on a new account. By the next evening.
Concerned she’d hold up a project that had been a long time coming, Georgia emailed me:
Didn’t you tell me Nitro had a slick way to sign and share things from a distance? The Historical Society needs my signature and my arm isn’t 500 miles long. Is a signature from this far away doable?
What Georgia was missing in Go-Go-Gadget Arms abilities, she could indeed make up for with Nitro. For Georgia, Nitro Cloud was the perfect solution.
Here’s how to sign a document from any computer with internet access, using Nitro Cloud:
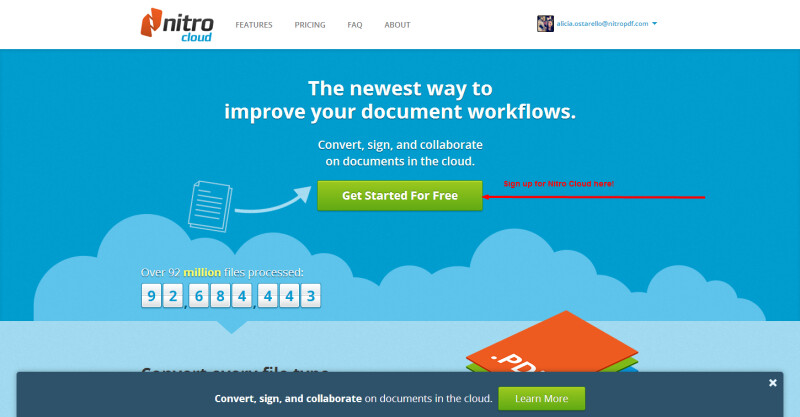
1. First, you’ll want to create a Nitro Cloud account. It’s free and takes just a minute.
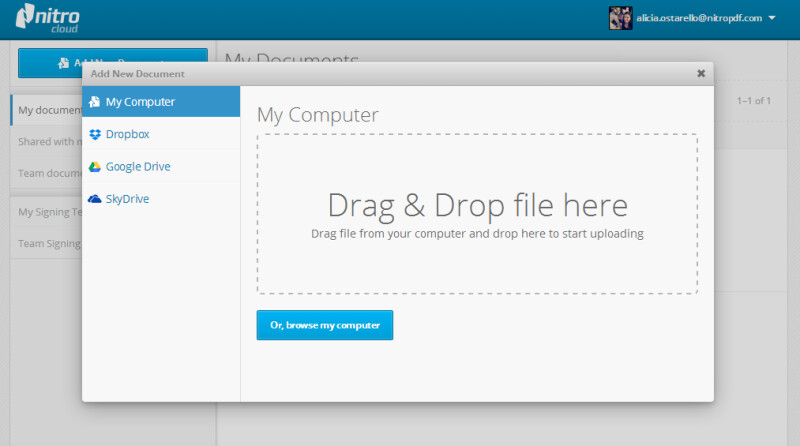
2. Once you have an account, you’ll see in the left hand corner of your screen a blue button that says “Add New Document.” A pop up window will appear, allowing you to drag and drop a file from your desktop, or take the file from your computer, Dropbox, Google Drive or Sky Drive accounts.
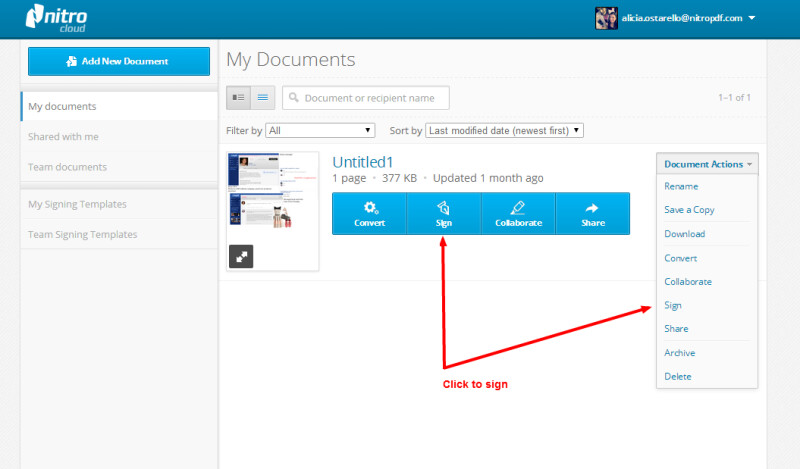
3. Your uploaded document will appear in your Nitro Cloud account. Notice there are lots of options for what you can do with your file, including converting it, collaborating on it, and sharing it. Select “Sign.”
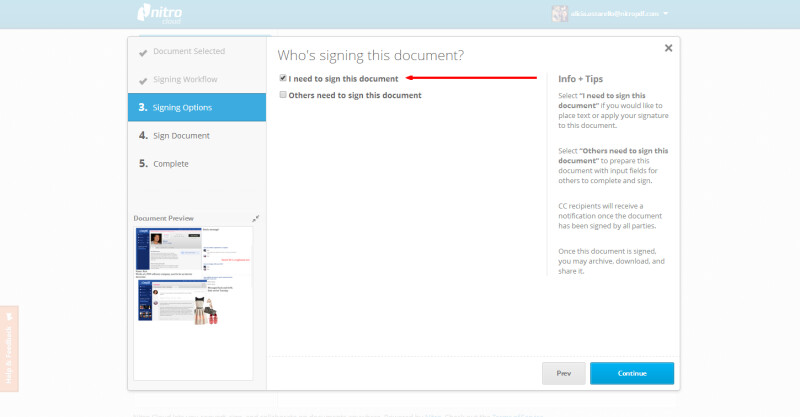
4. You’ll be asked who needs to sign the document – yourself or someone else. In Georgia’s case, she wants to sign a document sent to her and return it to the sender. However, it’s also possible to upload a document and check “Others need to sign this document” and then share the document with them, even if they don’t have a Nitro Cloud account.
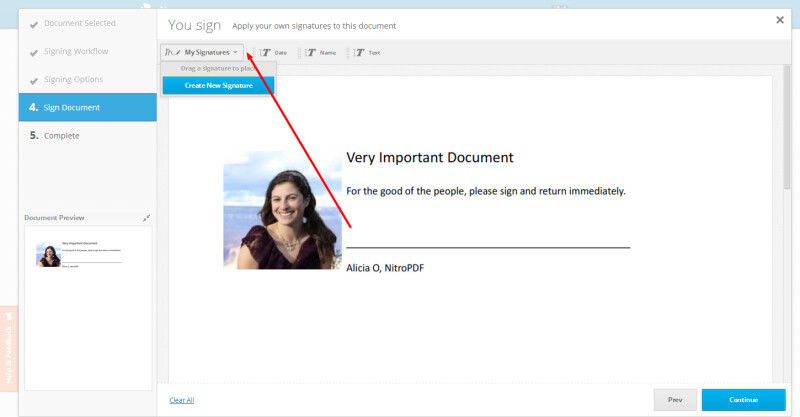
5. To sign the document, click “My Signatures” and select “Create a New Signature.”
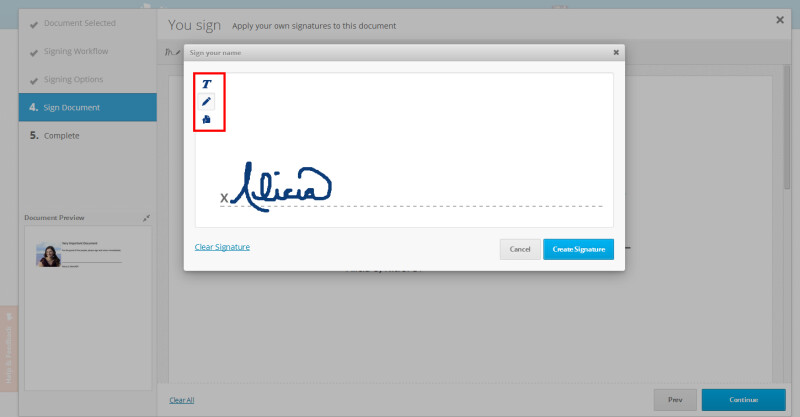
In the pop up window, you have the choice of signing your name using your cursor as the “pen,” typing in a signature, or uploading an image of your signature. I chose to sign my name.
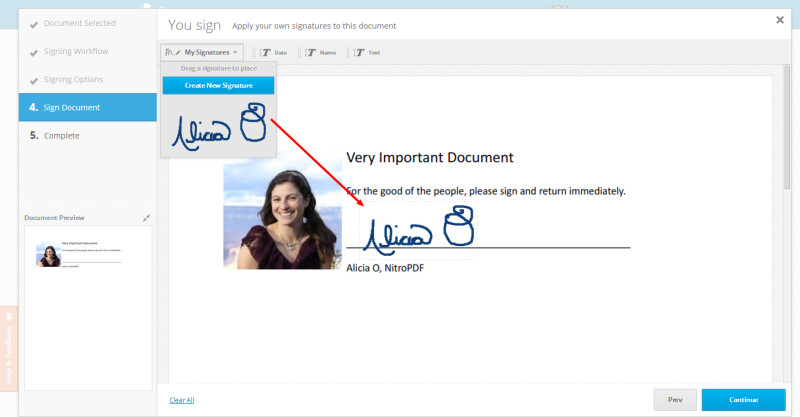
6. Now, click on “My Signatures” and the signature you created will appear, and always be there for you to use. Drag and drop the signature into the space you need to sign. You can adjust the size of your signature by adjusting the box around it once it is in place. When you click “Continue,” the signature will be applied and will not be removable.
7. Now, you can share your signed document right from Nitro Cloud. Click “Share,” and choose if you want to create a link to your document for anyone to see, or if you only want to share with specific people. Input the email address of who you want to share with, and select “Share” at the bottom of the page.
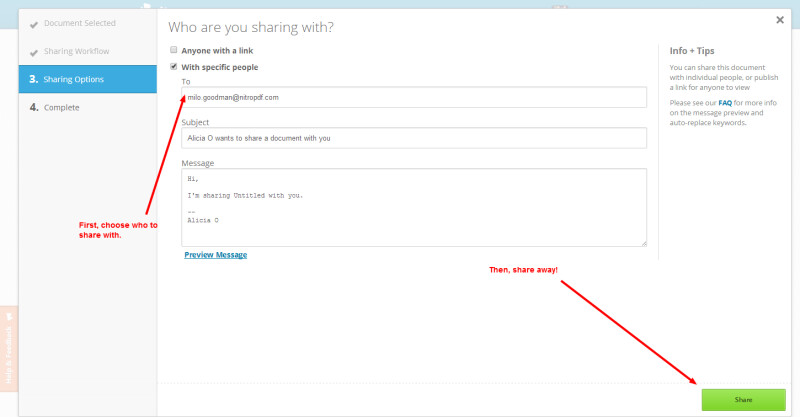
Once this process is complete, you’ll be notified when your document has been viewed by the people you shared it with, ensuring you have visibility into if you need to follow up with them or not. And that’s it!
Georgia’s story has a happy ending. Using Nitro Cloud from the depths of Death Valley, she was able to quickly and easily sign the forms, and the Historical Society Project moved forward without a hitch.
We’re collecting stories from real-world people who have found they #NeedNitro when in a bind. Do you have a tale? Share a short one on Twitter, or drop us a comment below.

